Tuesday 15 December 2015

Efcolor Enamels (Low Temp Enamel Powders)

For Christmas a (good) few years ago I very happily received a small, secondhand, jewellery kiln and all the accoutrements required for a number of enameling projects. Sadly, I have only used it a handful of times for a few reasons... 
1. It cost a lot to run. 
2. It makes my husband very nervous (I had to buy a fire extinguisher to help alleviate his fears) 
3. I don't have a dedicated work space for it, so it takes planning to get out and to pack away etc (and basically I'm too lazy/disorganised for that).

I quite often feel a bit guilty/frustrated by this but I have recently stumbled across Efcolour Enamels on Cooksongold.com
I treated myself to the starter set below and, boy, was I delighted that I did!! The stuff is fabulous. 
They are low temperature enamel powders that "fire" at 150°C, how amazing is that?!
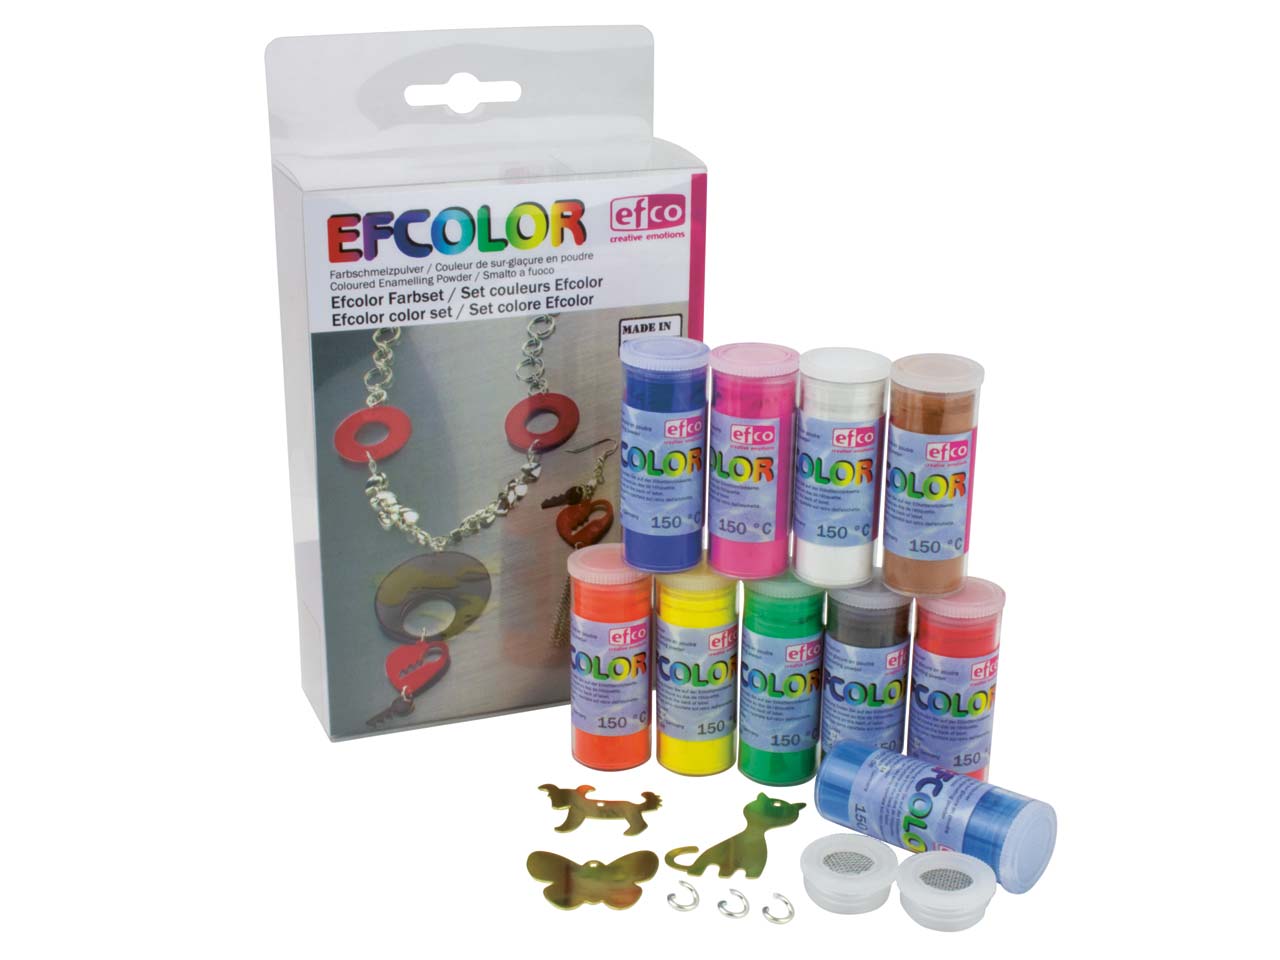
The starter kit contains 10 x 10ml pots of different, brightly coloured powders, a couple of sieve tops that can be fitted directly to each pot and a few metal blanks.
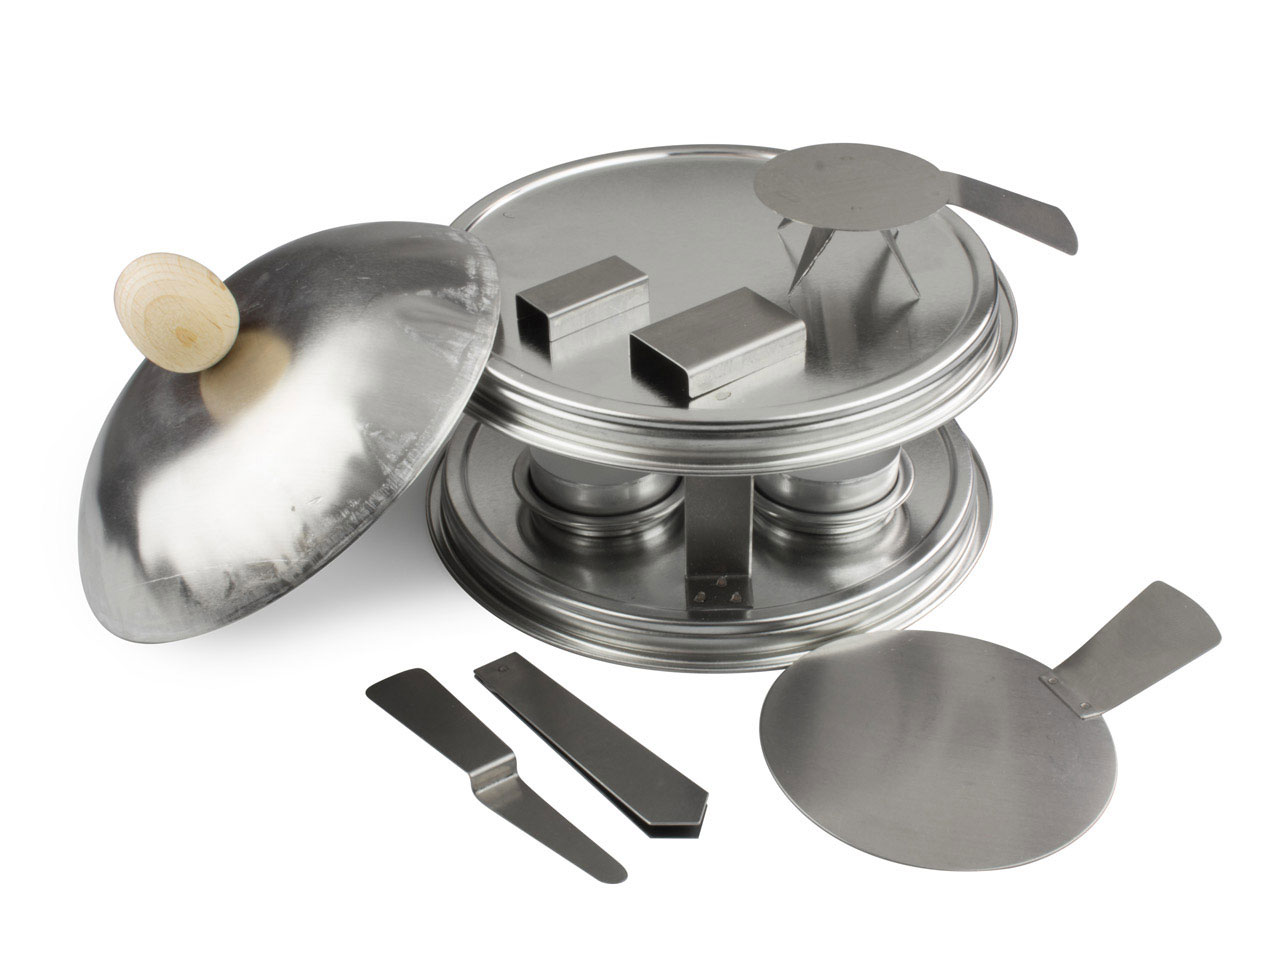
For my first project I used my kitchen oven but when I realised how great the stuff was I bit the bullet and bought the tealight stove - another purchase I certainly don't regret.
Here's mine after a few (very enjoyable) enameling sessions (with a glimpse of a scented tealight I used to add an extra level of pleasure)...
Another handy purchase was a packet of extra sieve tops as you only get 2 in the starter set, a few more come in useful as it saves having to clean them between powders when using a number of colours. One per pot would be the ideal but I have already spent enough so I'll make do for now.
They're easy enough to clean, the pic below shows one before cleaning and the others after the cleaning - I just used a dry cloth after tapping away the excess.
I've been a busy little beaver with the stuff and will share some things I've learnt and a few projects in upcoming posts. 
Just for comparison though - in the photo below, I made the top pair of earrings with "proper enamel" in the kiln and the bottom ones were made using Efcolor enamel.
As you can see the results are quite different but, in my opinion, both have their own pleasing qualities- would you agree?
Until next time, craft in earnest! Craftin' Ernest x


Thursday 3 December 2015

Loving Thanksgiving in Boston!

Hello, after promising to be more strict about posting blogs, I haven't made a great start. This post doesn't contain any crafting either!
That's because I spent last week Stateside, getting to experience Thanksgiving for the first time. My sister and I met up with two of our cousins in Boston. My cousin, Kate, is in her third year of university in America, we promised to visit and Boston isn't too far from her. Her brother, Mark, flew over from Ireland to meet us as well.
We had the best time (easy in great company) and Boston is wonderful!
Not being American, Thanksgiving doesn't really mean much to us, so we weren't sure what to expect, but we had such a good day. It was like an early Christmas (without the pressies), spending time with family and eating delicious food. Actually I'm thinking of adding spiced, mashed, sweet potato to our Christmas menu with roasted pumpkin seeds on top- super yum. 
To add to the fabulous feeling of Christmas we watched the Blink Christmas Tree Lights to Music Show, in Faneuil Hall Marketplace, every night we were there.
The one shame about our trip is that I missed going into a wool shop by about 30 seconds! As part of the Freedom Trail we visited the Old South Meeting House and stayed until closing time. On our way out, I found out there was a wool shop right beside it (which could even be enter from the Meeting Hall's gift shop) and it was closing too and I didn't have a chance to go back- not good! Ah well, you can't have it all.
I did get some crochet done en route though - the beauty of a long flight. You'll never here me complain- it's the perfect excuse to sit for hours hooking away ;-) 
I'll share that next time, until then - craft in earnest, Craftin' Ernest x

Monday 16 November 2015

It's Been A Little While Sorry! Here's a Scarf Tute

Hello there!
Firstly I have to apologise as it's been a good few months since my last post- awful blogging etiquette I know, I'm very sorry. I will mend my ways, promise!

I have still been making things including the following scarf! It was made by recycling a pair of palazzo trousers. I took pics along the way, albeit rubbish ones with my phone but you can get the idea from them.
First you need a pair of trousers with baggy legs (although you could skip this step if you have fabric you like, or use a long skirt/dress- whatever you like). I loved these trousers but with a hole by the zip and the bottoms getting a little worn it was time to re-purpose them. The trousers (or the fabric) will need a good iron.
From each leg cut two equal rectangles of fabric so you have four pieces of fabric all the same size, in my example the sections measured roughly 26cm x 76cm (11 x 30 inches).
With right sides together,  sew two of the section together along the shorter ends. Repeat the same step with the other two sections (my fabric looks very similar on both sides in the photographs but the birds on the outside are more crisp in colour)
I used a 1cm seam allowance throughout the project (except for the final seam).
Open both sections out so you have two double length pieces, each with a seam in the centre. Pin these two lengths together, again right sides together, with the seams meeting in the centre. Sew the two long sides together.
At this stage you will have a long tube with the seams on the outside. Tuck one half inside the other with the right sides together so that the unsewn edges meet (with the sewn seams meeting on either side). Pin these together and sew around the edge leaving a section open.
The section left unsewn- approximately 10cm.
Turn the scarf the right way out through the unsewn hole, so all the seams are on the inside.
Tuck the raw edges in and the pin the hole closed.
As close to the edge as possible sew the opening closed.
The finished seam...
And that's the scarf done!
All ready to wear- just wrap it around twice and you're all set.
Here's a picture of the finished scarf (after a day's wear) to show it's length open- approx 66cm (26in) or about the length as a semi stretched cat, who was keen to help with my measuring ;-)
I'm very pleased with how it turned out as I really love the fabric and still get to enjoy wearing it, even though the trousers were past their best.
I'm definitely going to make more using raw fabric (rather than altering items of clothing) for Christmas presents for friends.
Thanks for taking the time to read this post! 
Until next time (which I promise won't be as long as last time), craft in earnest! Craftin' Ernest x

Monday 29 June 2015

A Baa-rilliant Doorstop

Is it just me or does the Summer seem to be much busier than Winter? Maybe in the Winter it's just easier to curl up cosy with some wool and needles, or to ensconce yourself in front of the sewing machine for the whole day without being distracted by the outside world? I don't know but I'm finding it hard to get the time to make as much as I want to at the moment!
Thankfully I do have a list of "have to make" items which gave me the excuse to stop everything to craft.
On top of the list was a sheep doorstop for a friend who asked me to make it for a gift (by the way, please forgive the rather boastful title, I just liked the play on words). I didn't have to ponder for too long on how I would make it- out came the crochet hooks and wool and I designed it as I went along.

For the body, I decided upon a standard creamy, "sheep colour". For added texture I used seven strands of yarn together making it nice and chunky with a 10mm hook.
Four of the strands were the same yarn along with three different yarns of slightly different colour and texture. I started by chaining 5 stitches, adding a round of treble crochets (doubles in US terms) into the chain then continuing to work in rounds of treble crochet.
For the head and tail I switched to black yarn, again using different yarns together, in this case two types, and a 4mm hook.
The head was made with three different crocheted sections sewn together with two ears sewn on once crocheted. I attached the head at a slightly jaunty angle as I always think it gives a slight quizzical impression that I find cute (could be just me).
The tail was was a crocheted strip folded and the sides sewn together. Both were made using double crochet stitches (US singles).
I partially stuffed it with the filling from an Ikea cushion- my go to stuffing of choice, it's so much cheaper than buying the stuffing directly from a craft shop and still meets all the safety requirements!

To give it weight I set plaster of paris in a bowl with odd screws and bolts I had cluttering up a kitchen drawer. I wrapped this in scrap fabric to cushion it. (In a previous post with an owl doorstop tutorial I give more details about weighing it down) 
For the base I sewed a piece of green felt to the bottom row of crochet stitches.
A couple of black beads were sewn on as the finishing touch for eyes.

Fingers crossed she likes him?!
If you would like the actual pattern to create one yourself just let me know and I'll sort it out.
Until next time, craft in earnest! Craftin' Ernest x


Saturday 20 June 2015

Celebrating in Salisbury

Last weekend my husband and I headed down to Salisbury for a long weekend to celebrate our sixth wedding anniversary.

Back in January, when I was booking somewhere to stay I noticed most of the places were fully booked and I thought to myself, "gosh Salisbury is a popular location!"
It wasn't until I had finally booked a B&B after a lot of searching that I thought I would check to see if there was a particular reason for that weekend being so busy.
Indeed there was and it was a case of not putting facts I knew together!
One of the reasons I wanted to go to Salisbury is because the cathedral is home to one of the copies of the Magna Carta, the best preserved one in fact. I was also well aware of the fact that this year is the 800th anniversary of the signing of the Magna Carta. So knowing those 2 facts and that everywhere was almost full right at the beginning of the year you would have thought that I would have worked out that it would be the anniversary whilst we were there! I'm a dope.

Day 1 consisting of exploring and shopping. Fisherton Mill, appropriately located on Fisherton Street, is amazing and most definitely worth a visit! It's a wonderful space filled with exceptional goodies, all of which were exquisitely handmade (perfect for picking up my pops a Father's Day present too). There was a lovely coffee shop on the ground floor with yummy looking cakes but sadly we had just eaten. I was told by another customer though that the coffee was the best he'd had in a long time. Upstairs are a number of studios, well worth exploring.
There was Born To Knit, as the name suggests it was filled with lovely yarns, books and tools. I was very restrained and only bought a single ball of wool but I certainly couldn't leave empty handed. Next to that was Create Escape, a boutique haberdashery and bespoke soft furnishing makers, there I picked up a couple of lovely fat quarters. There were many other studios worth having a look around as well as higgledy-piggledy floor boards and old machinery.
Also on the same street was a wonderful shop called Franklins, the downstairs of which was mainly dedicated to sewing and including machines, fabric threads etc. Upstairs housed all the yarns and books, notions and what-not. All in all another great shop.

Our plans for the Sunday included lots of history and culture, we  went to the cathedral to see the Magna Carta.

We also visited the ruins at Old Sarum managed by English Heritage. We were pleased to discover vintage buses had taken over the main square as the local bus service "Salisbury Reds" which cover Wilts & Dorset routes were celebrating their centenary.
There were lots of vintage buses to be seen and we got to take 2 free trips, one of which dropped us off at the ruins- how handy!

Another part of the celebration was "The Barons' Trail", 25 life-size, decorated baron sculptures representing the barons who represent the wealthy landowners who signed the Magna Carta alongside King John. My favourite was Baron 1 "Conrandin", the design is based on medieval illustrations of the Guilds and craft workers who helped create Britain!

In the evening on our way to dinner we stumbled across some yarn-bombers- appropriately disguised with knitted facial hair.

Their mission was to promote their group Yarn ARTivists, they looked like they were having a lot of fun doing so, this is their Facebook page. Great stuff!

I would recommend a weekend in Salisbury, lots of lovely shops (most importantly good crafty ones) and restaurants and plenty of sight-seeing (although not all the celebrations we were lucky enough to encounter)
Until next time, craft in earnest! Craftin' Ernest x

Tuesday 9 June 2015

An Easy To Make Button Necklace

On a recent trip to the picturesque city of Wells (the details of which can be read here). I picked up a tin of buttons from a charity shop. On a side note - it was a Quality Street tin which in my experience is by far the nation's favourite container to home buttons once the chocs have gone, as such if I see the familiar glimpse of white and pink in a charity shop or car boot sale my heart does begin to flutter.
Among the treasure inside the tin were these 5 buttons...
They're leather with small sections of thin wire for decoration. They are shank back buttons where the actual shank is a puffy circle of fabric protruding from a hole in the back. There's probably a technical name for them but I don't know it.

Anyway, I thought they'd make an interesting statement necklace so decided to give it a go and it was dead simple.

You will need:

Large buttons- shank ones are good for this but not essential, holed buttons will work
Strong glue (e.g. E6000)
Chain with fastening (e.g. a lobster clasp)
2 jump rings
Pliers (to attach jump rings)

I arranged them until I was happy with the look of them, basically a downward v shape.
I removed the the fabric shanks with scissors.
I then glued them by overlapping so that the bottom button (the point of the v) is lowest, the adjacent two are glued on top on the lowest one. I also put a spot of glue between the edge of these two sticking them together for a bit of extra strength. Then I glued the uppermost two onto the middle two.
I wrapped them with low adhesive tape while the glue dried completely (I left them 24 hours in this instance). Once I was happy they were securely stuck together I removed the tape.
It's then just a case of attaching the chain.
To keep it simple, I just attached a jump ring to each end of chain and glued one to the back of one of the uppermost buttons and the other side to the opposite button.
Again leave to fully dry and then you're all done!
What do you think? Not bad for for a simple make with unusual buttons in my opinion. I'll update with a photo of it being worn when I don't look like I've been dragged through a hedge backwards ;-)
Until next time, craft in earnest! Craftin' Ernest x

Sunday 31 May 2015

A Board Book Duck Brooch Tutorial

I mentioned in a previous post about my day trip to Wells that I had bought a few things for future craft projects and that I would share the details with later. This is the first of one of those posts...

I picked up a child's board book for a bargain price of 40 pence called "I Went Walking". It's written by Sue Machin and has lovely illustrations by Julie Vivas. 
What caught my eye was the duck on the front. My mum loves ducks, so much so my parent's house is named "Teach na Lacha" which is Irish for "House of Ducks" and is full of duck items- they're on cushions and curtains and she has lots of ornaments (no actual ducks though as they don't have the room and "it would be too messy").
I really liked the duck illustration and thought I could make something for my mum with it. Happily the duck features on most pages and I decided to make a brooch with one of them.
It turned out to be quite simple project and really any board book could be used if you want to give it a go.

You will need:
  1. First cut out the image with the craft knife. I found this can take a while as you need to go over the cuts a few times to go right through but be patient, you'll get there.
  2. "Glaze" the image using the embossing powder- press the image face down onto the colourless stamping pad, cover with embossing powder, tip off excess and heat until all the powder has transformed. (Even though I was using extra thick embossing powder I decided to give it two coats by repeating the same process, this resulted in a wavy surface. I didn't mind that but wouldn't do it next time).
  3. Place image face up on reinforcement layer and draw around the edge as closely as possible then cut out with craft knife.
  4. Glue to the back of the glazed image, spreading the glue as close to the edge as possible without lots seeping out, and leave to fully dry.
  5. Glue a brooch finding to the back and again leave to cure.
  6. Draw around the edge of the brooch slightly going over the edge on the front and back to give a silver rim effect.
  7. You're all done, wear with pride!
    Happily my mum loved it and that makes me a happy bunny. I'll certainly be looking out for other board books to convert when in charity shops.
I'd love to know your opinion or if you give it a go. Thanks for reading.
Until next time, craft in earnest! Craftin' Ernest x