Showing posts with label Box Frame. Show all posts

Thursday, 21 May 2015

Dandelion Clock

My last post described how I upcycled an old clock (minus the mechanism) into a box frame complete with Summer scene and stamped "quote". 
I said I was pleased with the result which was good as I had another 2 clocks ready for the same treatment, well I figured there's no time like the present so I cracked on with the second one. 
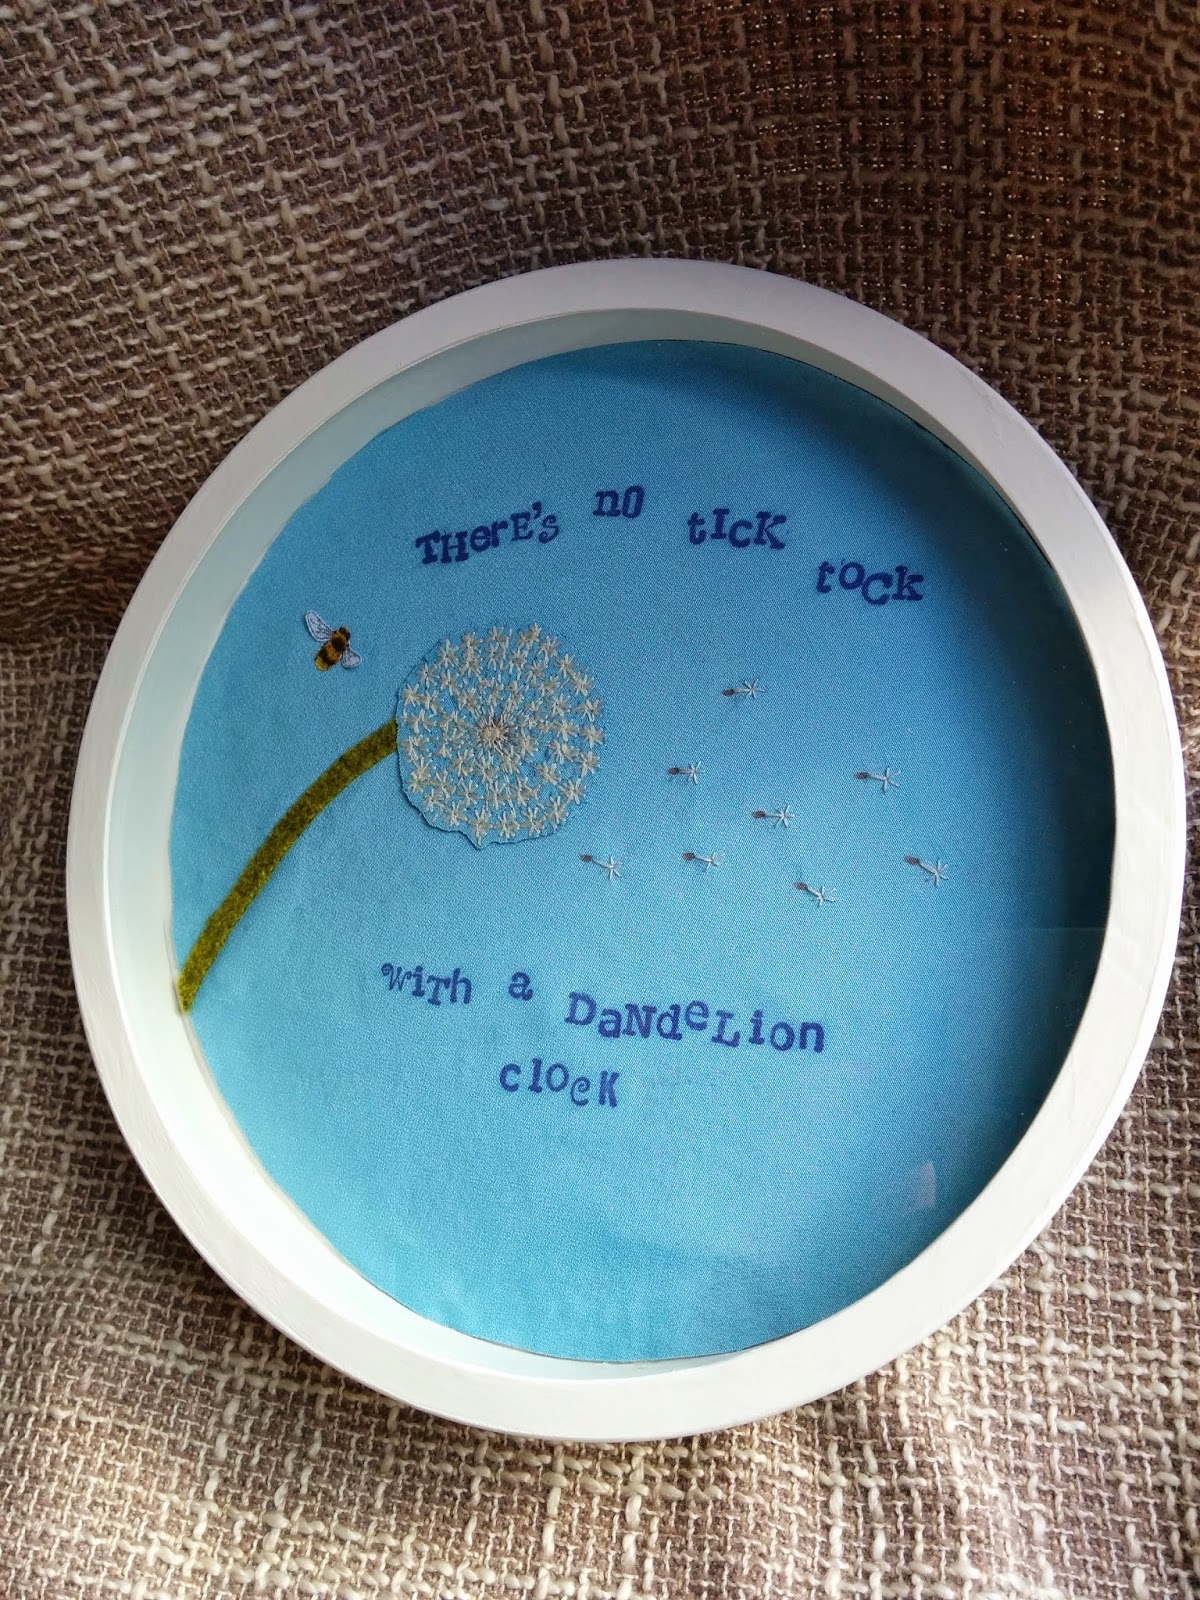
I ran with the Summer theme again but also referenced the former use...
I chose " There's no tick tock with a dandelion clock" and followed the same process as last time (here). I have no idea why but with this one the stamped letters didn't blur even though I did exactly the same thing. Crafting can be like that, huh?
For the head of the dandelion I drew and filled in a circle with a brown fabric pen. Using my sewing machine I sewed lines radiating out from the circle. I then sewed a spiral over the lines with a decorative stitch that looks like connecting asterisks *******
This caused the fabric to pucker slightly so I cut it out and attached it to a new background with Heat n Bond. I added the wind blown seeds by hand, using the brown fabric pen for the bottom and then hand sewed the top, again an asterisk shape on top of a slightly longer double stitch connected to the brown dash. As with the previous picture I added a bee buzzing around because it just wouldn't be right without one!
One more to go...
I'd love to know which you prefer! Thanks for reading.
Until next time, craft in earnest! Craftin' Ernest x

Wednesday, 17 July 2013

Button Art and a Bumble Bee!

Well the Sun is still shining! This Summer is certainly making up for the complete lack of sunshine South Wales had last year. My lovely hubby did the unenviable job or sorting out the garden shed and getting out all the garden furniture. I did help clean them off though. I know, where would he be without me huh?
So an afternoon of crafting in the garden was called for, under the protection of a large parasol and very high factor sunscreen. As I had my latest acquisition of charity shop buttons to sort, it was a perfect excuse to do some button related crafting. I had a few box frames to hand so I decided to create a heart shaped picture using buttons to go inside one of the frames and, even though was no rain in sight, I chose to use the colours of the rainbow- the brighter the better!
I covered a piece of board in plain white fabric using double-sided sticky tape. After taking the time to arrange the buttons into a design I was happy with and then just glued them on with regular PVC glue. I used tweezers to individually pick up each button so not to disturb the lay-out and applied a generous blob of glue to each button before returning it to it's picture. Once it was dry I tentatively turned it over to see if I had missed any, which I did- three in fact (I was distracted by carrot cake part way through). Once they were fully attached I popped the finished article into the frame. So simple but I really like the finished result.
We went to a Food Festival in Cardiff Bay on Sunday and ate lots of scrummy food. Delicious ice cream was almost a medical necessity as it was so hot. We bought "pick and mix" brownies to enjoy at home. My sister and I decided on the way back to stop off en-route and buy a paddling pool!! We sat in it for the rest of the afternoon, eating our delectable brownies (it was a tie between double chocolate and peanut butter) and sipping chilled drinks- it was heavenly!
I did have to save this little beauty at one point! I used one of the acrylic sheets from my Sizzix Machine- crafting items can be very versatile ;-) It was very wet but once I had scooped it out and left it to dry off, it flew away, thankfully seemingly none the worse for the experience.

Keeping crafting in earnest, Craftin' Ernest xx
Monday, 18 March 2013

Salt Prints with a Vintage Twist


Last year I took part in a great, day long workshop at Bristol’s Folk House making salt prints. 
The Bristol Folk House is a charity run, adult education centre which run a variety of classes from Arts & Crafts to Fitness and Personal Development. It also has a really gorgeous café which makes amazing Spanish omelette and little dark chocolate, truffle bites- simple delectable! http://www.bristolfolkhouse.co.uk
The salt printing is a process for making “photographs” using common table salt and silver nitrate. The resulting prints have a lovely, old fashioned brown hue and a vintage quality.


The process was quite simple and as it was a sunny day we used sunlight to develop some of our prints but a dark room and the paraphernalia that goes with it is also essential. We also used UV bulbs and as I have a pet tortoise we have those at home so I had every intention of doing more at home but as is so often the case even with best intentions…

Here is a link to a website I found with great instructions on salt printing which includes a few examples:
For some time I have wondered what to do with the prints, I also had some box frames (bought in The Range) hanging round the house. I decided to grab my box of trinkets, some lace and the obligatory buttons and put it all together. Layering things up as I thought went with the prints. Some of the lace, whilst actually old, was still quite white so I “aged” it by soaking it in some hot water with a teabag. Some of the buttons had shanks so I removed them with a pair of mini wire cutters. I stuck everything together with either double sided, sticky tape or contact adhesive.
The frames were just plain, untreated pine. I stained one with a single coat of dark oak, wood stain. I painted the other larger one with regular emulsion in “Brandy Cream”. I then scribbled all over it with a dark brown, oil pastel, rubbed that all in with a piece of cloth then sanded it down with some fine sandpaper.
I’m quite pleased with how they turned out. I think if you fancied doing something similar you could always use a nice wrapping paper instead of salt prints- there are lovely vintage ones available!


Thanks for reading! Always Craft in Earnest !-)