Thursday, 28 August 2014

Book Review - 100 Flowers...

Okay, well straight off, I love this book. 100 Flowers to Knit & Crochet by Lesley Stanfield (Search Press Publishers) is just lovely, right from the gorgeous cover onwards.
As it still has the receipt tucked behind the front page I know I bought this exactly a month, to the day, before I got married in 2009. For an instant it confused me why I had bought it then as I had a lot going on, for example I still hadn't started on my wedding dress (they don't call me Queen of Procrastinating for nothing)!! 
I quickly remembered it was because of the pattern for a thistle. My Dad is Scottish and was wearing full dress kilt for the wedding, even though there were fresh thistles in his buttonhole I wanted to make him something to keep. I remember him being really pleased and it is now attached to the corner of his pin-board in his computer room.
Sorry, please excuse the photograph, my Dad just text it to me as I lost the one I had taken!
Despite the name, there aren't just flowers in the book- leaves, butterflies and a few fruits are included too. 
The book is divided into 4 sections. The first being "Before You Begin" which explains how the book works and gives you the details about what you'll need along with the basics of knitting and crochet. 
This is followed by the "Directory of Flowers" which is a lovely gallery of the different finished items all arranged by complimentary colours with the number of the pattern needed next to each. 
All of these are in the next section "Technical Instructions". The first part of this contains the knitted flowers and the second has the crochet, both of which are arranged by level of difficulty. 
Having said that I don't think any of them are scarily complicated unless you've never picked up needles or a hook before. The author herself states that, "the designs are created by simple shaping rather than fancy stitches" and I quite agree. 
Unfortunately, in my opinion, there are no patterns which include both techniques which I think would be interesting. 
All the crochet patterns use British terminology but there is a section explaining the differences to American terminology on page .
I really like the way no specific wool/yarn is given nor are needle/hook sizes. Experimenting is encouraged!

So the first thing I made was the thistle of course. Then due other commitments as mentioned I didn't get a chance to make anything from it for a while.
The next time I did pick it up it helped me through quite a difficult time. My husband had to have what was considered quite a routine operation but unfortunately things didn't go to plan so he ended up spending a lot more time in hospital than expected. During this time I made quite a few different items, it was so helpful as he had to go off tests for lengths of time and rather than sitting twiddling my thumbs and worrying, I was productive and slightly distracted at least. Also because they're small items they are easy to pick up and put down or stuff quickly in your bag. 
My favourite pattern is the field poppy and I made quite a few, here's a couple of examples...
I really like to use embroidery cotton and small needles/hooks to make items to attach to cards or for more delicate accessories.
I would highly recommend this book and have just ordered another book by Lesley Stanfield- 75 Birds & Butterflies to Knit & Crochet. I'm excited about it arriving already.

All the opinions expressed are totally my own and I would to hear your thoughts about either of the books!

Until next time- craft in earnest, Craftin' Ernest x

Friday, 22 August 2014

Framed Earring Stand

Hello! Summer has turned decidedly wet in South Wales and cold too. I am wearing lots of layers today :-( and I'm missing the sunshine but on the bright side, it is a great excuse to stay inside and craft!
This means I finally finished knitting the top I started a couple of months ago. I treated myself to the kit for the Juliet Tee from We Are Knitters' website and just adored the the colour and texture of the cotton yarn when it arrived, it's incredibly soft and the colour (wine) is so sumptuous. 
It was a little bit a labour of love as it included 248 rows of moss stitch- not one of the quickest stitches to knit to be fair. Also, if I'm making an item for myself it often drops to the bottom of the list as I feel guilty putting something for myself above something for others. I very much doubt that's just me?!
I also suffer from the problem that if I spend a long time on something it has to be exceptional to live up to the effort .
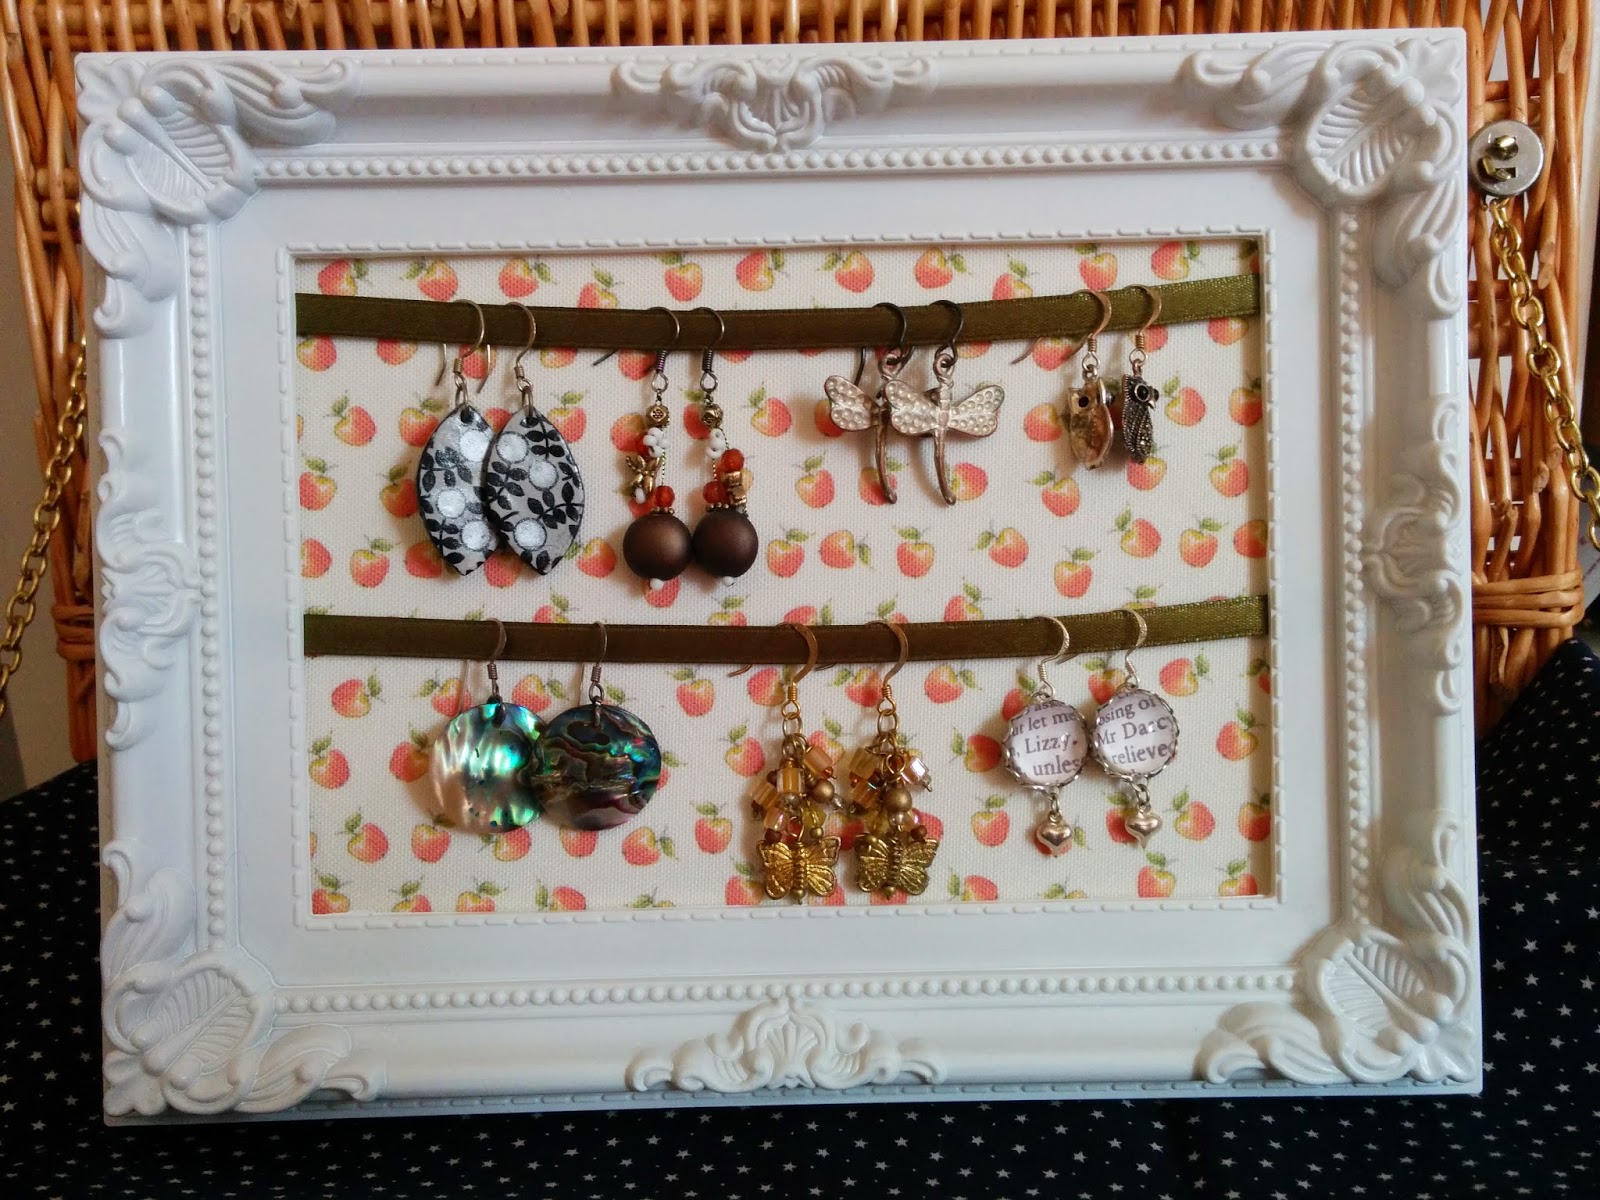
On the other hand the following item took almost no time at all & cost very little- an earring display stand made from a frame that I picked up in a Poundland store for the somewhat unsurprising cost of £1. However, a second-hand frame from a charity shop or vintage fair would work just as well/even better.
The glass can be discarded (by that I mean added to the pile "stuff I will find a use for at a later date". Yes it is ever growing pile with the definite possibility of taking over one day).
Cover the back section of the frame i.e. the section with the stand attached. I used adhesive backed fabric but decorative paper or regular fabric would be fine and just apply the glue to the back before applying the paper/fabric or double sided sticky tape could be used.
It's hard to see but the fabric is being stuck to a chipboard back
Then attach lengths of ribbon across the frame in the orientation you wish your frame to stand. I decided on landscape so decided on 2 lengths of ribbon. If I had chosen portrait I perhaps would have done 3 rows.
Attach the ribbon to the inner edge of the frame as shown in the photograph. Normally I would do this with a stapler but as this frame is plastic I used extra strong double sided tape. I attached the top one about half a centimetre from the top and the second about half way between the top one and the bottom edge of the frame.
Insert and the back as usual and hang your dangly earrings proudly on display!
A simple but effective way to display your earrings that looks rather pretty in my opinion.
Thanks for having a look!
Craft in earnest, Craftin' Ernest x


Thursday, 7 August 2014

Embroidered Button Earrings

Although it's now Thursday (where do the weeks keep going). I had an amazing weekend mainly because my bestie/sister returned from a two week holiday on Sunday so we had a catch-up shopping trip/smoothie drinking session. I also had a lovely coffee morning with old friends, bliss. The other reason was due to me having a major button bargain on Saturday morning- I bought 4kg of buttons for £3!! That meant five hours of blissful sorting on Saturday afternoon (I should have been finishing a knitting project but that's a different story).

Amongst my treasure trove there were a lot of fabric covered, shank- backed buttons and most of which were in pairs. This gave me the inspiration to make some into earrings. By gluing an earring finding to the back of each the jobs a good'un in about 60 seconds flat but I wanted something individual so decided to embroider a simple design on each using embroidery cotton and satin stitch.
To make them you need:
A pair of fabric buttons
Embroidery cotton
Sewing needle
A pair of earring posts with backs
Scissors
Glue
Piece of paper (at least as big as the buttons)
Pen

Make a stencil by drawing around one of the buttons then draw and cut out your chosen design. I went for a simple heart so folded the paper in half to cut the heart.

Using the stencil draw the design onto the button. I used a pen whose ink would be visible but not startling obvious so was not the easiest to pick up on the photograph.

Split 2 strands of the cotton and thread onto your needle, with the needle in the middle giving your cotton 4 strands of thickness. Sew the first stitch from the centre of the heart down to the tip at the bottom, do not completely draw the thread through but leave a millimetre or so protruding- this will be hidden under the satin stitch and means there is no need for an unsightly knot.

Following the outline and using satin stitch (http://www.wikihow.com/Satin-Stitch) "fill in" your design.

Once the design is complete, sew a long stitch under the design and cut the cotton. Repeat the process for the second button.
Glue and earring post to the back of each. The buttons I chose had a piece of material as the method for sewing them onto something. I cut this way in order to glue the posts to a more secure surface. If your button has a shank snap this off.
Once the glue has dried completely, you're all done!
I now plan to make a pair in every colour.
Until next time craft in earnest, Craftin' Ernest x