Showing posts with label Jewelry. Show all posts

Tuesday, 2 September 2014

Crochet Ringed Necklace Tutorial

I can't believe it's September already, time is just flying by! However, as it's my favourite month I don't mind too much. Whilst the weather has actually taken a change for the better with the Sun shining brightly, the colours of the leaves have started to change and Autumn is certainly on it's way. Before I get cracking on the big woolly scarves and hats I thought I would make something a little more delicate....
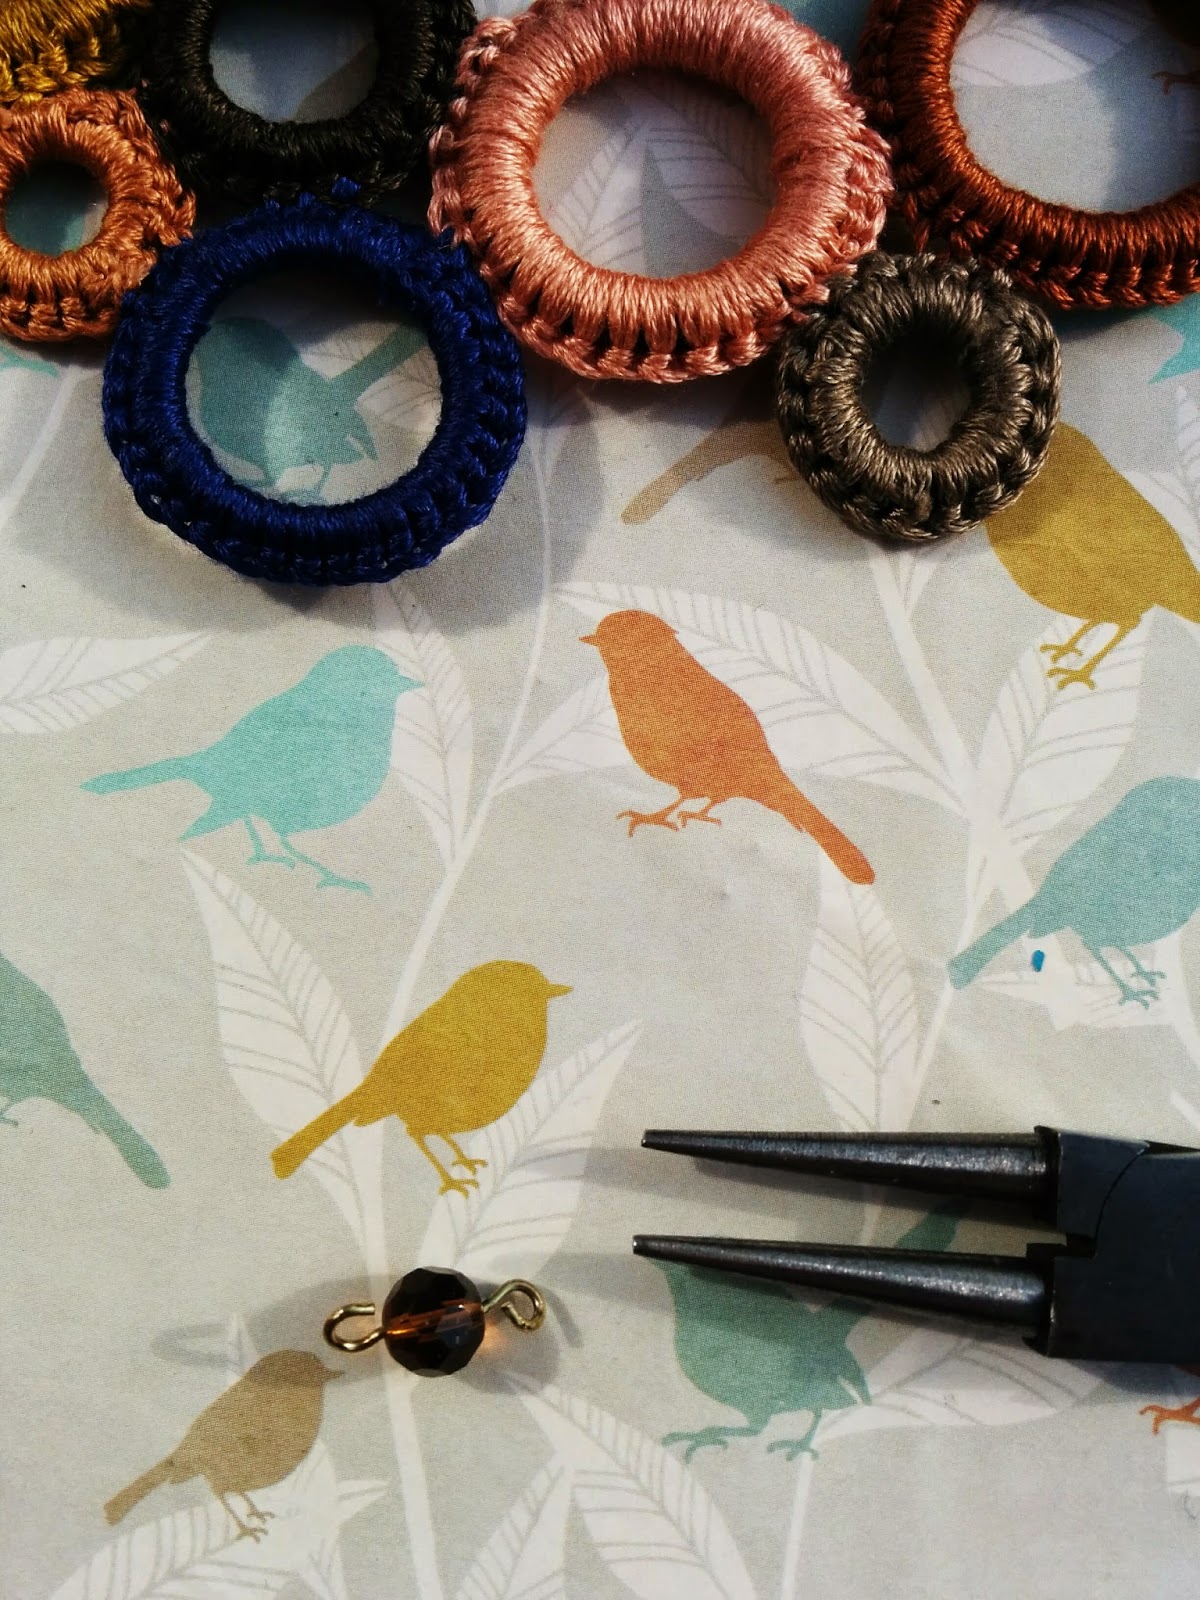
I've seen necklaces similar to this a few places and really like them. So when I stumbled across an assorted pack of rubber o-rings for 99p in the hardware section of my local Wilkinson's the other day, I immediately knew they'd be just the thing I needed to make my necklace. As they vary in diameter and thickness I thought they'd provide the perfect, varied base rings and they are flexible but hold their shape, also they weigh next to nothing so the necklace would be nice and light.
I'm afraid I didn't take the picture until after I'd opened and removed the o-rings I was going to use- sorry dopey me!
What you need:
O-rings (or similar for you base- you might find something you prefer/better)
Embroidery cotton or fine yarn
Small crochet hook
Sewing needle
Scissors
Chain, jump-rings and fastening e.g. lobster clasp
Pliers
A couple of beads are optional but do make a nice addition in which case a small amount of coordinating wire is also needed, together with round-nose pliers and wire-cutters.


I decided to use 7 of the rings (I always think odd numbers work best for this sort of thing) so I chose the same number of different embroidery cottons to use. I picked 7 colours I liked the look of together and that I thought would go with a range of my clothes. My favourite colour to wear is navy so that was my starting colour and I went from there. Alternatively you could use just one colour or different shades of the same colour might give a nice finish too?

Once I had decided on the colours I arranged the o-rings to a rough layout I liked and started to crochet.
Throughout I used double crochet (dc) with a 2.5mm hook and treated the o-rings as a chain ring and crocheted into the "chain space". Obviously the number of stitches required varied depending on the size of the o-ring but I kept pushing the stitches tightly together to make sure you couldn't see any of the black rubber. 
Once I had completely finished the round and was happy there was no gaps I joined the last dc to the first dc with a slip stitch.
At the end of the round I left a long tail of cotton on each ring to use to sew the rings together. 
I did this by sewing a few crochet stitches from two rings together with the tail from one then pulling the thread through a few of the hoops around the ring and cutting off the excess.
I repeated this step with each ring being sure to keep the arrangement of the rings on the design I decided up. The tail of the final ring isn't needed so I sewed this into the hoops of the ring as previously and again cut the excess.
Once all the rings are sew securely together you just need to add the chain. This can be done by attaching a jump ring to the upper, outer edge of the two end rings, going though the top of a single crochet stitch and the end of the chain (see * below as with the beaded step). Then attach the clasp to the other ends of the chain also using jump rings.
If you decide to add beads, thread one onto wire and create a loop either side of the bead with the round-nose pliers. 
Attach one of the loops to the crochet stitch on the ring as with the jump ring and the other loop to the chain. Finish as before.
*If using a jump ring insert as above and attach the chain directly
All done! I'd love to know if you make one yourself. 
Thanks so much for taking the time to read my blog, I really appreciate it!
Until next time craft in earnest, Craftin' Ernest x

Friday, 22 August 2014

Framed Earring Stand

Hello! Summer has turned decidedly wet in South Wales and cold too. I am wearing lots of layers today :-( and I'm missing the sunshine but on the bright side, it is a great excuse to stay inside and craft!
This means I finally finished knitting the top I started a couple of months ago. I treated myself to the kit for the Juliet Tee from We Are Knitters' website and just adored the the colour and texture of the cotton yarn when it arrived, it's incredibly soft and the colour (wine) is so sumptuous. 
It was a little bit a labour of love as it included 248 rows of moss stitch- not one of the quickest stitches to knit to be fair. Also, if I'm making an item for myself it often drops to the bottom of the list as I feel guilty putting something for myself above something for others. I very much doubt that's just me?!
I also suffer from the problem that if I spend a long time on something it has to be exceptional to live up to the effort .
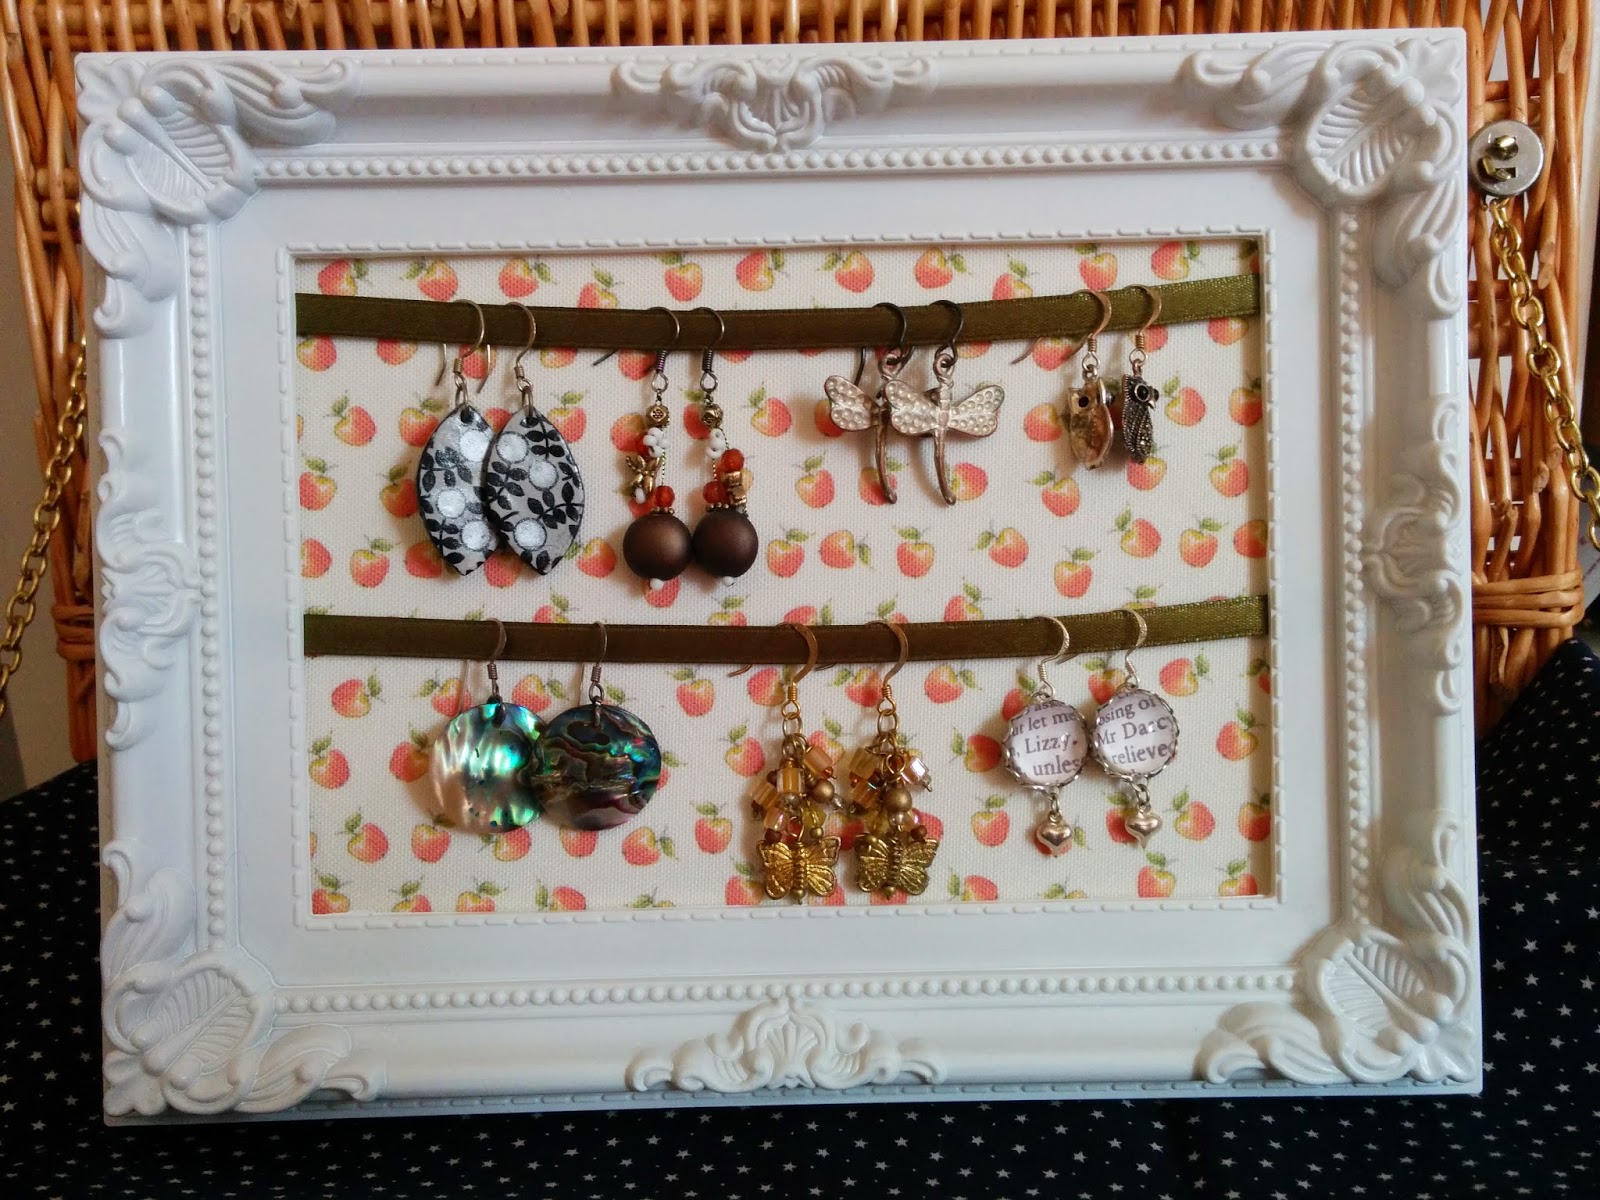
On the other hand the following item took almost no time at all & cost very little- an earring display stand made from a frame that I picked up in a Poundland store for the somewhat unsurprising cost of £1. However, a second-hand frame from a charity shop or vintage fair would work just as well/even better.
The glass can be discarded (by that I mean added to the pile "stuff I will find a use for at a later date". Yes it is ever growing pile with the definite possibility of taking over one day).
Cover the back section of the frame i.e. the section with the stand attached. I used adhesive backed fabric but decorative paper or regular fabric would be fine and just apply the glue to the back before applying the paper/fabric or double sided sticky tape could be used.
It's hard to see but the fabric is being stuck to a chipboard back
Then attach lengths of ribbon across the frame in the orientation you wish your frame to stand. I decided on landscape so decided on 2 lengths of ribbon. If I had chosen portrait I perhaps would have done 3 rows.
Attach the ribbon to the inner edge of the frame as shown in the photograph. Normally I would do this with a stapler but as this frame is plastic I used extra strong double sided tape. I attached the top one about half a centimetre from the top and the second about half way between the top one and the bottom edge of the frame.
Insert and the back as usual and hang your dangly earrings proudly on display!
A simple but effective way to display your earrings that looks rather pretty in my opinion.
Thanks for having a look!
Craft in earnest, Craftin' Ernest x


Monday, 10 June 2013

Heart-shaped Earring Tutorial

Today's post is a tutorial to make a pair of HEART-SHAPED EARRINGS using wire and embossing powder. They're actually surprisingly easy to make and I think look really effective. 
You will need:
2 x approx 45cm (18") of thin wire. 24 gauge works well but a bit thicker or thinner would work fine (I used a brassy coloured wire but you can use whatever colour you like).
Embossing powder (I went for classic red but again it's totally up to you. The brand I used for these was "Heat It Up" but I've used "Cosmic Shimmer" in the past and I'm pretty sure it would work with any brand)
Pair of earring findings (homemade or shop bought) 
Regular kitchen oven
Baking tray (or oven-proof dish)
Aluminium foil
Pliers and wire cutters
Hammer and hard surface
Paper and pen
Sharp needle/pin

Draw a heart onto the piece of paper roughly 2.5cm x 2.5cm (1" x 1").
Bend the end of one of the lengths of wire into a heart shape using the heart you drew as a guide. Using pliers fold the tip of the end around the wire to secure it.

Twist and weave the remaining length of wire around the heart-shaped frame using the pliers when needed.

Keep wrapping until you're happy the heart has been "filled in" evenly. Repeat with the second length of wire.
Then using the hammer and a hard surface, gently hammer both hearts flat.
Left-side heart = after hammering    Right-side heart = before hammering

Lay both hearts on a piece of foil on a baking tray (or oven-proof dish), not too close together.

Now cover the hearts with a thick, even layer of embossing powder. Originally I used a small teaspoon and applied the powder a little at a time using the tip of the spoon, this worked well but took a little while. I find it quicker to use the piece of paper rolled into a funnel. Pinch the end, closing the hole and pour in the powder. Gently release the pressure on the hole allowing powder to flow onto the heart. Repeat for the second heart.

Place the tray in an oven set to about 150°C (300°F) for a minute or two. The powder melts pretty quickly so keep an eye on it. Once all the powder has melted and become shiny, remove the tray from the oven and leave it to cool.

Once it's cool enough to touch gently peel away the foil. If needed, any excess around the edges can simply be cut away with a pair of scissors
 Before trimming the edges
After trimming

Using a sharp needle/pin, and being careful of your precious pinkies, pierce a hole in each heart- in the left side of one and the right side of the other.

Attach an earring hooks to each heart and you're all set!

I hope you like them and give them a go!
'Til next time craft in earnest, Craftin' Ernest x