Showing posts with label Ribbon. Show all posts

Tuesday, 7 April 2015

Storage Solution- Upcycled Box

Something my husband and I disagree upon quite regularly is how much stuff in the house is too much stuff? 
He strongly believes we passed the acceptable mark a long time ago and I've told him this is one of the downfalls of living with a "crafter"- to me there is no such thing as too much! 
OK I wouldn't like to end up on one of those reality TV shows where the council is sent in because you haven't thrown anything away for 20 years and can't move for old newspapers and dirty dishes with new lifeforms growing on them. 
But too much wool- not possible, overload of fabric- I don't think so, button boxes bursting at the seams- my idea of Heaven!
You just know the day you get rid of something is the day you find that's exactly what you need, that's a real frustration I do my best to avoid.

I will concede that this does make storage a bit of an issue and as such I do have a lot boxes, baskets, tins, pots, etc. 
I enjoy filling them with bits and bobs, forgetting where everything is and then rooting through them all making lots of discoveries, getting distracted and going off on a complete tangent.

I have boxes of all shapes and sizes, many of which people have kindly donated to me.
If I get a chance to decorate them before I fill them to the brim (this is rarely the case) so much the better.
My sister recently gave a box she had received as a gift from a friend at Christmas full of lovely Body Shop goodies.

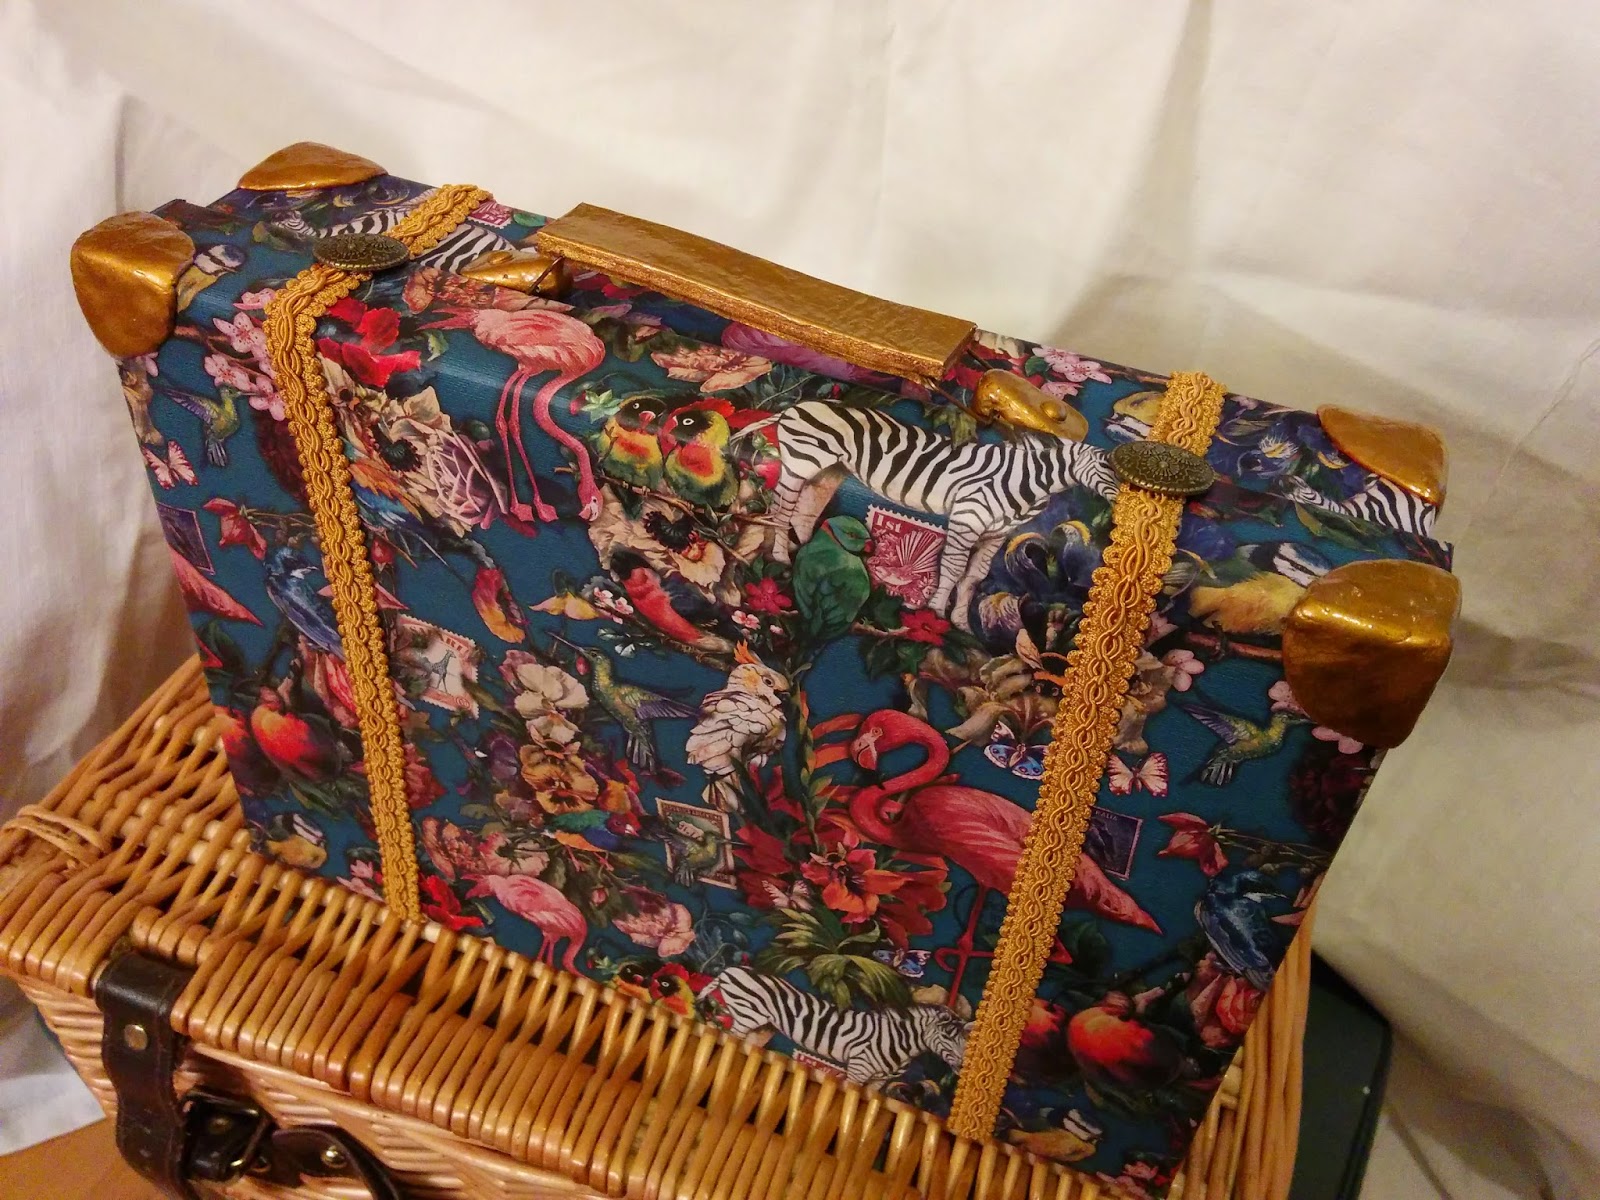
It was a nice sturdy box just right for a make over, so using some gorgeously ornate, eco-friendly wrapping paper from Wild & Wolf Ltd along with some Sugru, mouldable silicone glue, I transformed it into a vintage-style suitcase.

I cut one of the edges of the lid into a flap before covering the outside with the wrapping paper. I moulded the Sugru over the corners and used it to make attachments for the handle.
Once the Sugru parts had cured I painted them with gold coloured enamel paint. I made the handle using leather (also painted gold) and I attached it with wire rectangles made from hair pins. I added some decorative trim and flat metal beads as fake closures and the job was done.


Of course, now I have to find it a permanent home without upsetting the hubby....
I'd love to know what you think of the finished case and whether you believe there is such a thing as too much crafting stuff (although I'm going to stick with no)?

Until next time craft in earnest, Craftin' Ernest x

Wednesday, 18 March 2015

How to Keep your Teapot Snug- Part 1

A friend of mine has introduced me to the pleasures of a cup of green tea and having previously never drunk hot drinks (hot chocolate not included of course) I’m now addicted and drink umpteen cups a day. I've even got my sister drinking it as well though she was very skeptical to start with, not liking hot drinks even more than I did.
We now have our TV catch-up evenings, watching the likes of “Downton Abbey” and “Call The Midwife” with our pot of green tea made using teabags.

Last month I went on my annual February trip to Ireland (see previous trips here & here) and picked myself up a wonderful, retro-feel, stainless steel teapot with diffuser for loose leaf tea. It was in a Charity shop and was only 5 Euro, splendid stuff!
On a side note, I've got a thing about small teaspoons and also bought 4 of them whilst I was over there. Having only hand luggage booked on the flight I had to pack the teapot and spoons in my teeny wheely case, the airport security must have thought I take tea drinking very seriously as they were x-raying my case.

I decided this new teapot called for its own special tea cosy- so to the sewing machine.

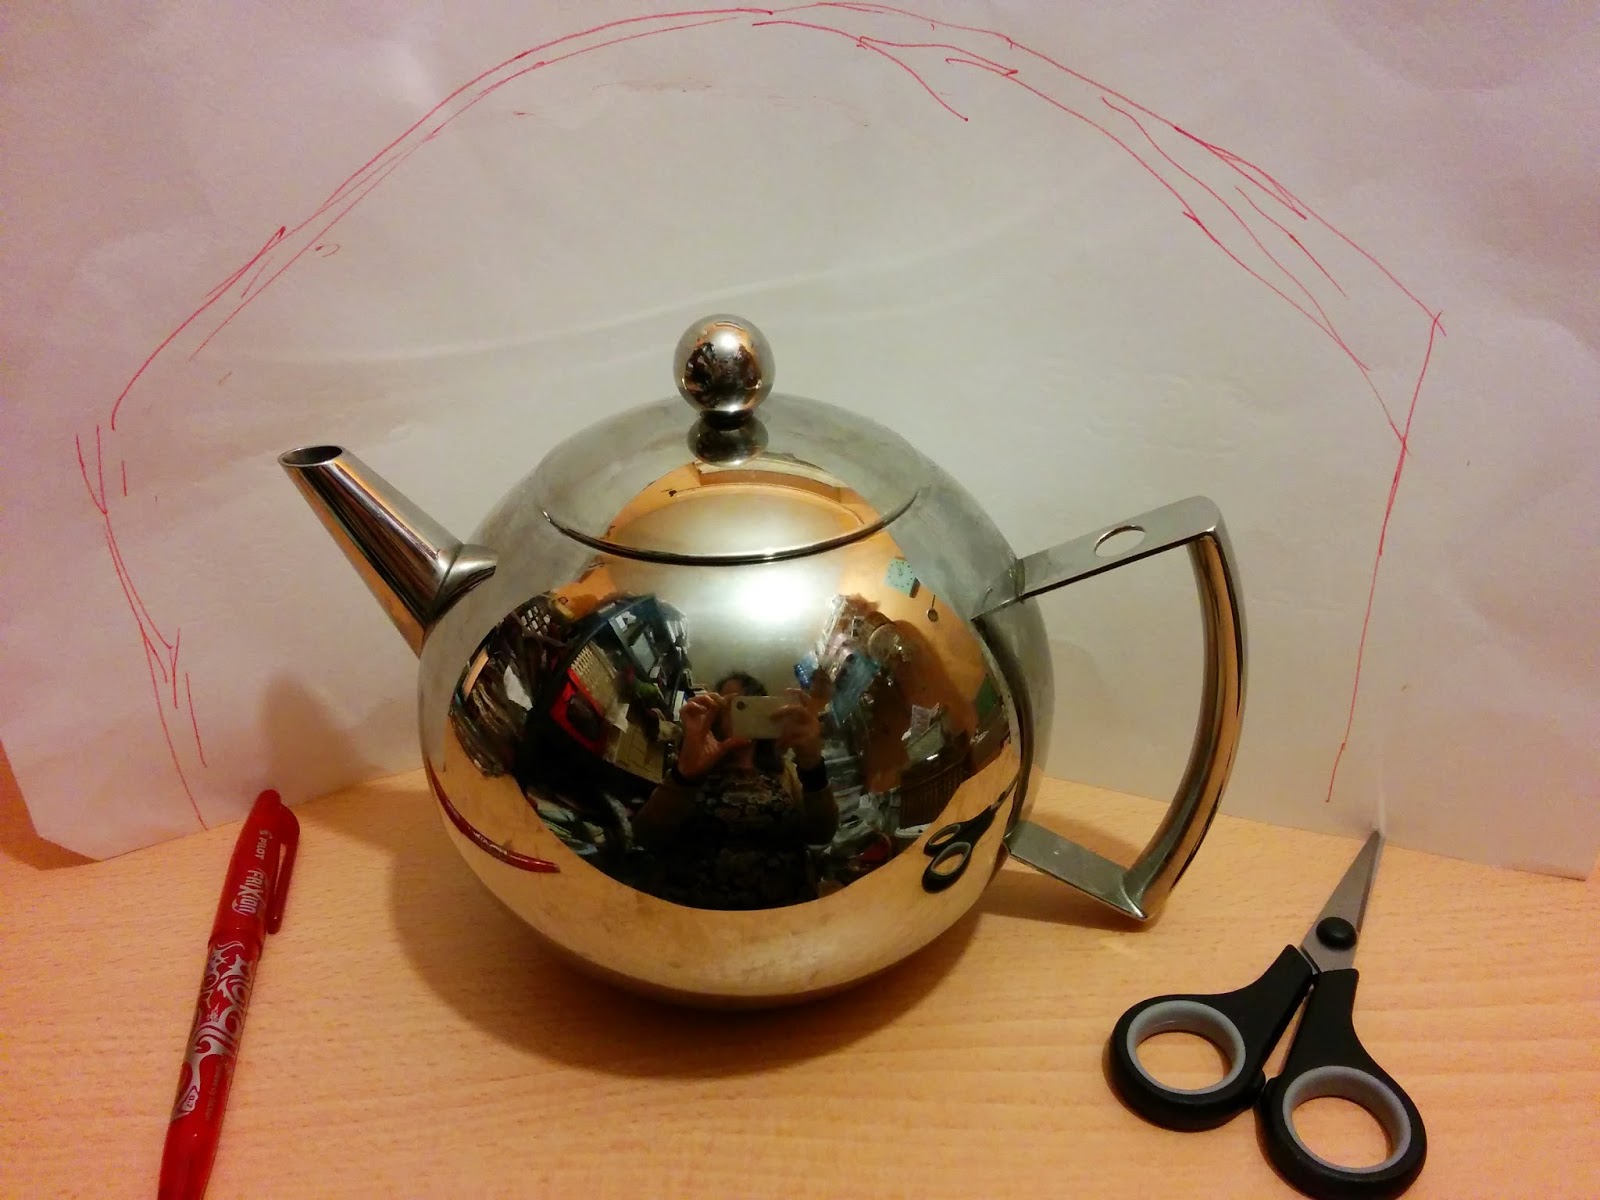
I used a large piece of paper to make a pattern by folding it around the teapot and drawing the rough shape I thought would work, I removed a notch from the top to create a rounded shape top once sewn.

I cut the template out and made adjustments as needed, for example, I had to shorten it.

Using the template I needed to cut out a total of 6 pieces-
2 pieces of outer fabric (patterned fabric in photo)
2 of the insulating layer (the black fabric in photo)
2 for the lining (deep pink fabric)
I actually used an extra insulating layer as I was “making do” with what I had to hand, the black fabric- a 100% wool felt and had it been a little thicker I would not have needed anther layer. I used a blue fleece, for a little extra warmth, on the back of the outer layer treating them as one layer i.e. I sewed the decorative pattern to both these layers as one.
For the main body of the cosy I picked a remnant of stone coloured fabric with a dark blue printed design of a plants and birds, I thought the folks at Downton would approve.
I used a zigzag stitch to machine sew a length of lace ribbon to each side of the outer layer approximately 5cm from the bottom.
I decided upon a teacup design, cut a template out of scrap cardboard, and picked a bright, fuchsia pink fabric which technically is actually a napkin- I bought these a few years ago in Primark for the ridiculous price of £2 for 4 large napkins, they were always destined for a sewing project in my house not their intended purpose. I used another napkin for the lining to match the teacup.
I used “Heat n Bond” to attach the teacup. “Heat n Bond” is amazing stuff and well worth having in your sewing arsenal. It has paper on one side and the mesh of bonding fabric on the other. First you iron it onto the fabric of you design, in this case my pink fabric, with the paper facing up. You draw your design on the paper; this can be done free hand or using a template as I have done. You can then cut it out. 
Once you have your shape, the paper is removed and the design is attached in place with an iron. I've always had nice strong bonds using “Heat n Bond” but I like to sew around the edge for extra strength but more importantly because it looks so much nicer.
As every project can be improved with a few buttons, I hand sewed some teeny ones onto the cup as polka dots. It occurred to me afterwards that I hadn't sewn on a saucer, Lady Violet would have been appalled! 
I repeated the same for the other side and that's the decorative part done. 
In part 2, to follow in a few days, the cosy comes together and the tea in the pot is kept nice and toasty, until then craft in earnest! Craftin' Ernest x

Friday, 22 August 2014

Framed Earring Stand

Hello! Summer has turned decidedly wet in South Wales and cold too. I am wearing lots of layers today :-( and I'm missing the sunshine but on the bright side, it is a great excuse to stay inside and craft!
This means I finally finished knitting the top I started a couple of months ago. I treated myself to the kit for the Juliet Tee from We Are Knitters' website and just adored the the colour and texture of the cotton yarn when it arrived, it's incredibly soft and the colour (wine) is so sumptuous. 
It was a little bit a labour of love as it included 248 rows of moss stitch- not one of the quickest stitches to knit to be fair. Also, if I'm making an item for myself it often drops to the bottom of the list as I feel guilty putting something for myself above something for others. I very much doubt that's just me?!
I also suffer from the problem that if I spend a long time on something it has to be exceptional to live up to the effort .
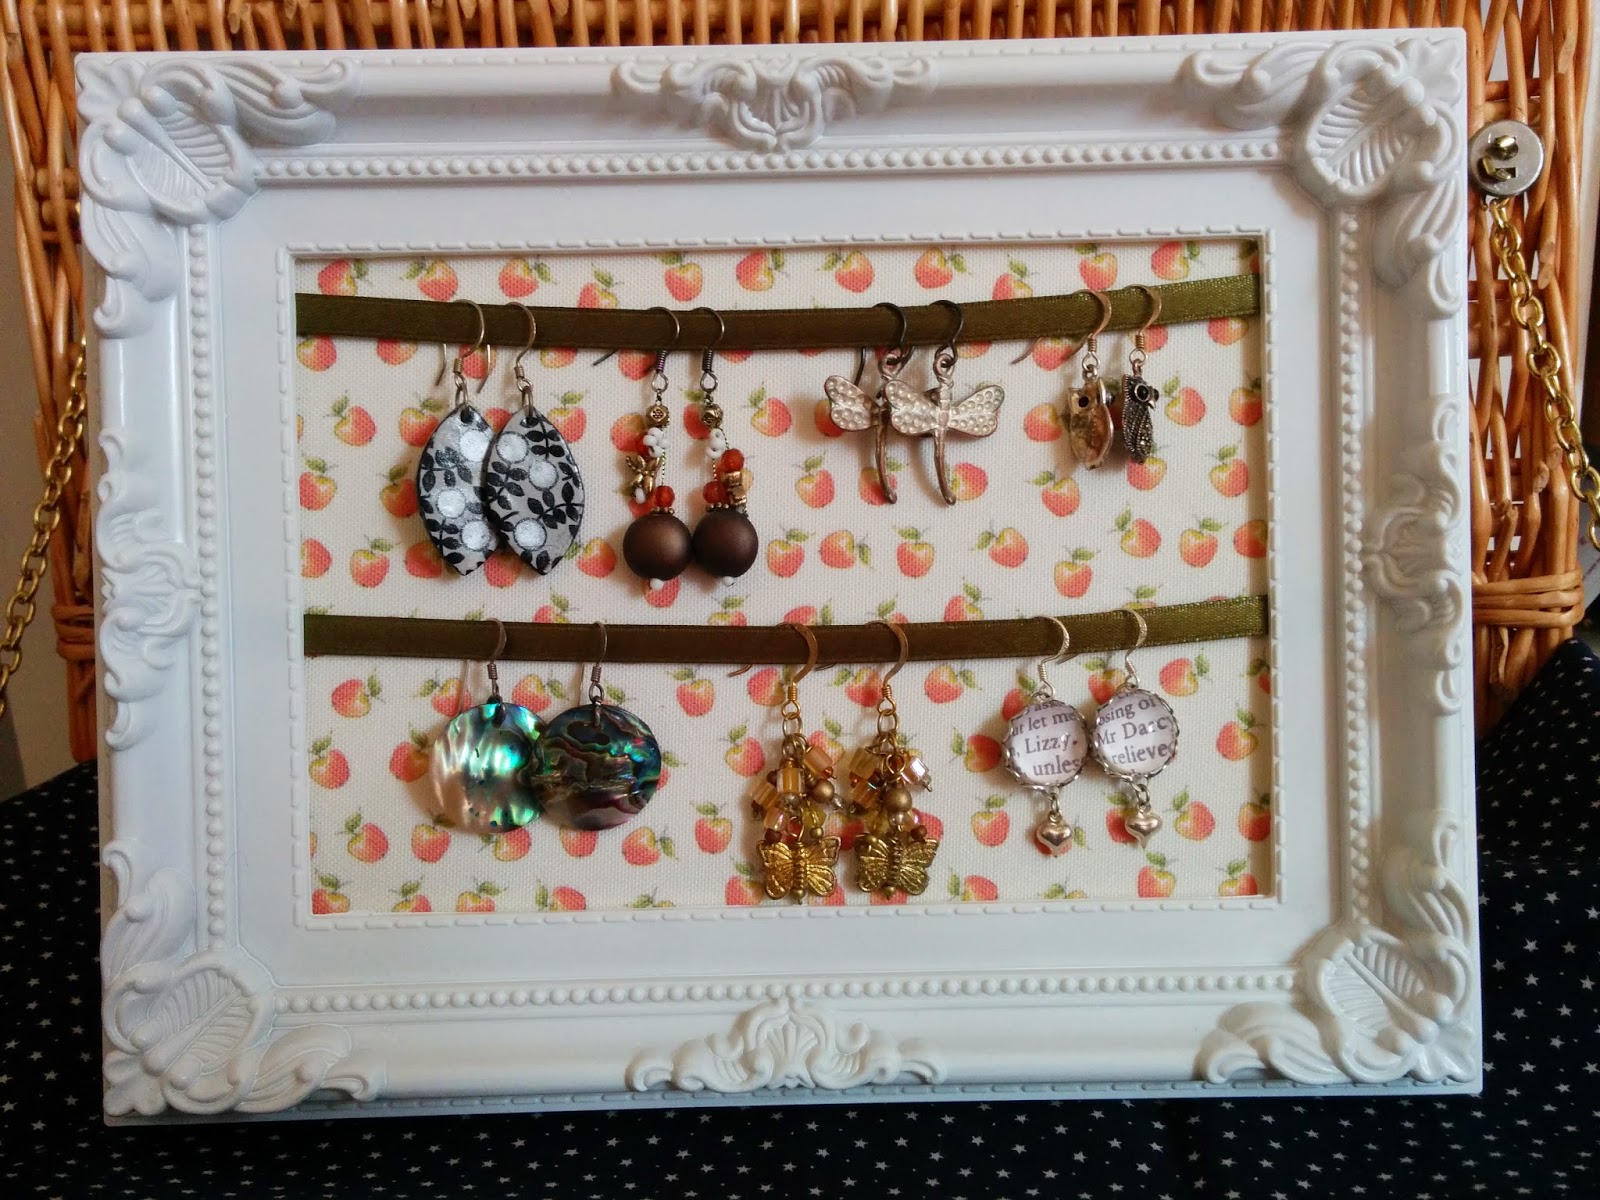
On the other hand the following item took almost no time at all & cost very little- an earring display stand made from a frame that I picked up in a Poundland store for the somewhat unsurprising cost of £1. However, a second-hand frame from a charity shop or vintage fair would work just as well/even better.
The glass can be discarded (by that I mean added to the pile "stuff I will find a use for at a later date". Yes it is ever growing pile with the definite possibility of taking over one day).
Cover the back section of the frame i.e. the section with the stand attached. I used adhesive backed fabric but decorative paper or regular fabric would be fine and just apply the glue to the back before applying the paper/fabric or double sided sticky tape could be used.
It's hard to see but the fabric is being stuck to a chipboard back
Then attach lengths of ribbon across the frame in the orientation you wish your frame to stand. I decided on landscape so decided on 2 lengths of ribbon. If I had chosen portrait I perhaps would have done 3 rows.
Attach the ribbon to the inner edge of the frame as shown in the photograph. Normally I would do this with a stapler but as this frame is plastic I used extra strong double sided tape. I attached the top one about half a centimetre from the top and the second about half way between the top one and the bottom edge of the frame.
Insert and the back as usual and hang your dangly earrings proudly on display!
A simple but effective way to display your earrings that looks rather pretty in my opinion.
Thanks for having a look!
Craft in earnest, Craftin' Ernest x


Tuesday, 4 June 2013

Trip to Shrewsbury

It's June, officially Summer in the UK according to the Met Office and the Sun is shining!
We're just back from an overnight trip to the town of Shrewsbury in Shropshire, about two and half hours drive away. A friend recommended it as she thought we would like it, she wasn't wrong (thanks Lynda)! It's a truly gorgeous Tudor town, absolutely steeped in history. I love the higgled-piggled nature of Tudor buildings, so distinctively black and white, and around every corner was something of interest.

Shrewsbury is also a crafter's paradise! I bought so many goodies. We split our takings from last weekend's car boot sale and I spent all of mine on fabric, buttons and ribbon (plus a pair of shoes- I just couldn't say no and a vintage suitcase which was an absolute bargain at £4 in a charity shop).

We walked out of the hotel at 9am and by 9:20 I had bought so much fabric I was giddy. Next door but one to our hotel was an amazing shop- Watson and Thornton Fabrics and Haberdashery. Our hotel room window was the top, pointy-out one on the right side of the photograph above the arch and their front door was less than a stone's throw- yay!
And that was just half of it. The full front is below.
Here's a few pictures of the inside- including m lovely husband paying for all my purchases- there were lots and I didn't even see half of what they had downstairs let alone what was upstairs (apparently it was just as big up there).

Thankfully they have an online shop too
http://www.watsonandthornton.co.uk/ I will definitely be looking ordering from them in the future. To top it all off, the ladies who served us were so lovely and helpful and made it even more pleasurable, if that's possible?
Here's a picture of some of the fabrics I just had to bring home with me ;-)
And one of the feature buttons and ribbons I couldn't resist. Note the ribbon quoting Oscar Wilde "I can resist everything except temptation", so very true!
I'm looking forward to getting busy with some of it at the weekend. What to make? So many ideas, so little time. . . . 

Until next time craft in earnest, Craftin' Ernest xx