Showing posts with label Fabric. Show all posts

Sunday, 19 April 2015

Day Tripping to The Historic City of Wells

Yesterday my husband and I headed to the historic city of Wells in Somerset, which as the crow flies is almost exactly 30 miles (48km) south of us. In reality it's actually about an hour and a quarter away, 21 miles (34km) south of Bristol and certainly worth the drive.
Steve bought tickets for The Bishop's Palace on Amazon Local and we were keen to see Wells' Cathedral too, so while the sun was shining we headed to Somerset's ancient city. Also as one of our favourite films, Hot Fuzz, did a lot of its filming in Wells we thought it would be great to see the place in real life. (My dad actually informed me after we were back home that we went when I was little but I honestly can't remember that.)
The Bishop's Palace was stunning & the cloisters of the cathedral were very tranquil.

Unfortunately we didn't get to go properly into the cathedral as a special service for a retiring Dean was taking place but what we did see was very impressive.
Saturday is market day so we had a good look around that, there was a large selection of items on offer. It included a farmer's market so we bought lots of lovely, local produce to enjoy over the weekend, my favourite being very tasty pies (chicken, mushroom and asparagus in filo pastry for me). The Town Hall was hosting an antique fair where I bought some delightful teaspoons just because I couldn't resist.

An absolute gem of a wool shop was located down a little street (Mill Street). It's very unassuming frontage completely hides the huge array of wares inside, it was massive yet you would never have known from outside. I didn't even know it's a name until I looked it up once home, Mandy Wools. It has a very large range of yarns, together with all sorts of crafty goodies such as buttons and clasps and vilene etc.
There was also Millie Moon, a fabric and haberdashery shop, there was no way I was leaving without a purchase or two from inside there!
Look how beautifully wrapped my items were, using a piece of pattern paper and Millie Moon labelled stickers.....
I almost didn't want to unwrap them but, of course, I did.
Around the corner from there was a wonderful little bead shop, Bella Beads Boutique, again I wasn't leaving empty handed.
On top of that I managed to pick up an old Quality Street tin containing, yep you guessed it, BUTTONS for £6.50 from a charity shop. They're just crying out to be sorted and that makes for one very happy Ernest!
And that doesn't even cover everything, I also bought 4 crafty books in an Oxfam bookshop and a few other bits and bobs to use in projects in the near future.
What a great day- as a place to visit I would highly recommend it!
Until next time, craft in earnest. Craftin' Ernest x

Wednesday, 18 March 2015

How to Keep your Teapot Snug- Part 1

A friend of mine has introduced me to the pleasures of a cup of green tea and having previously never drunk hot drinks (hot chocolate not included of course) I’m now addicted and drink umpteen cups a day. I've even got my sister drinking it as well though she was very skeptical to start with, not liking hot drinks even more than I did.
We now have our TV catch-up evenings, watching the likes of “Downton Abbey” and “Call The Midwife” with our pot of green tea made using teabags.

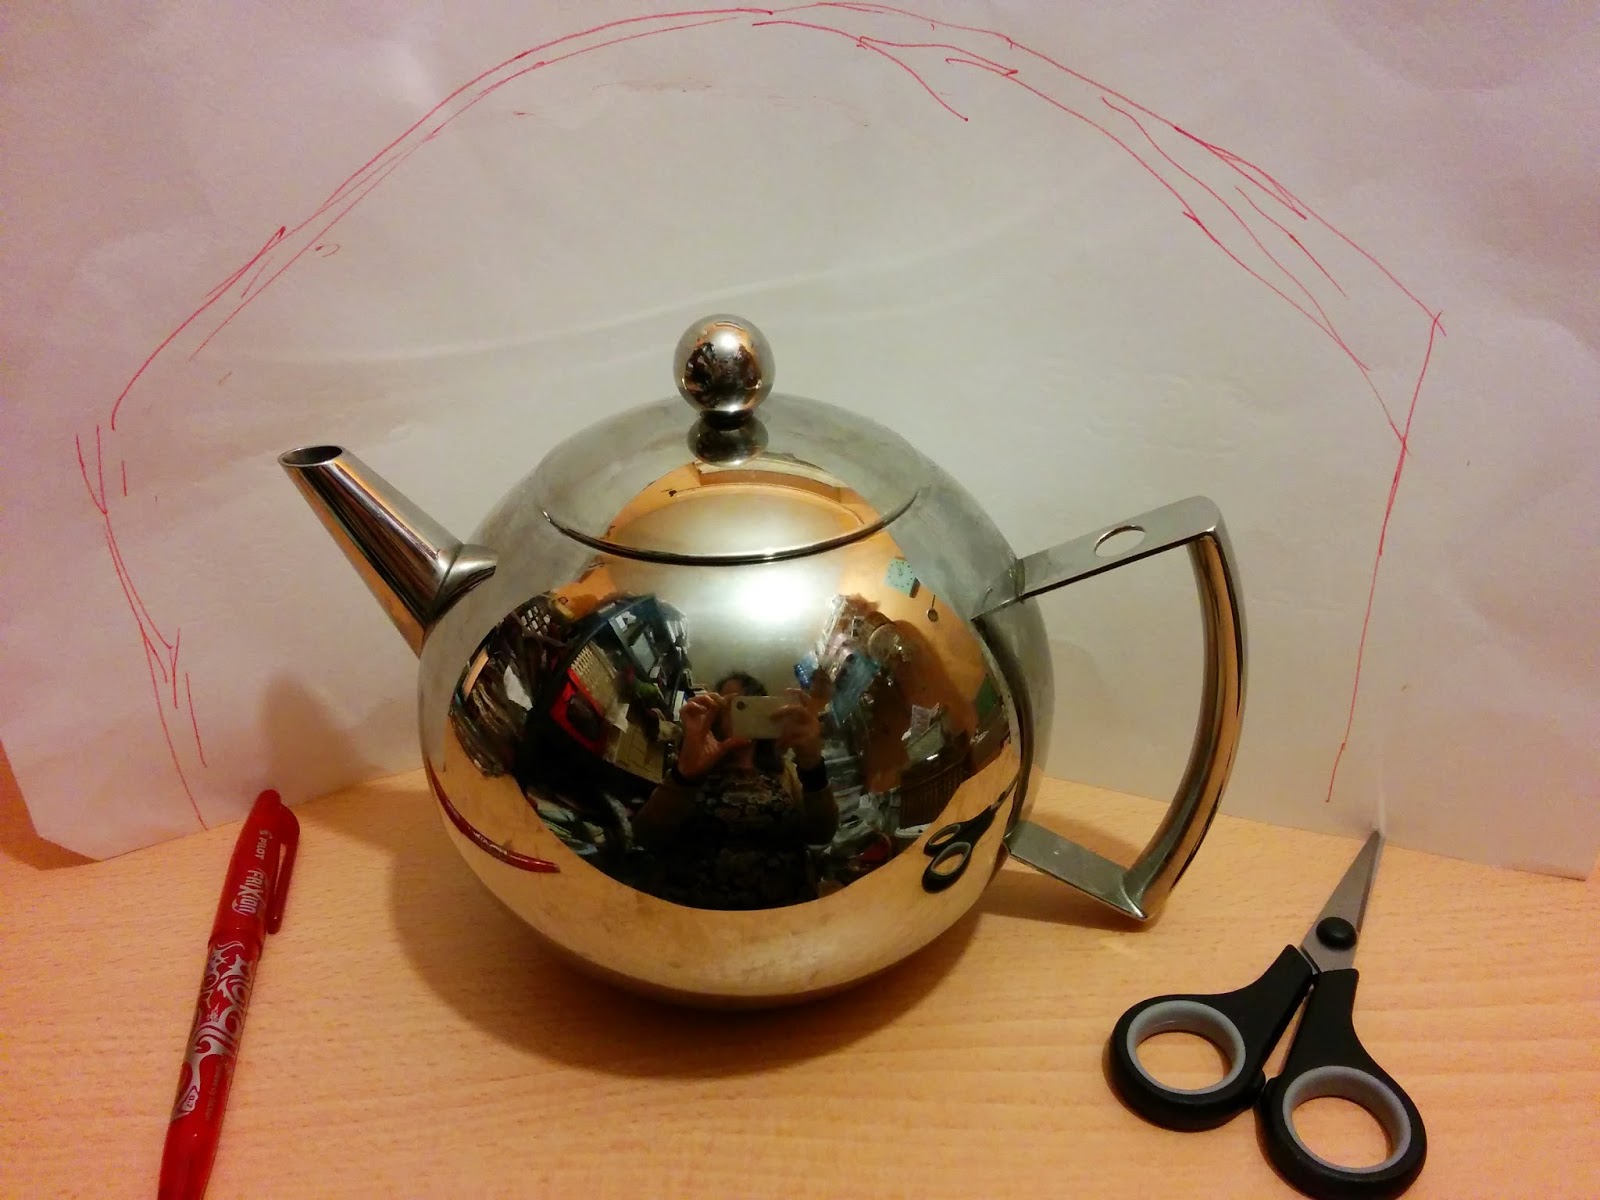
Last month I went on my annual February trip to Ireland (see previous trips here & here) and picked myself up a wonderful, retro-feel, stainless steel teapot with diffuser for loose leaf tea. It was in a Charity shop and was only 5 Euro, splendid stuff!
On a side note, I've got a thing about small teaspoons and also bought 4 of them whilst I was over there. Having only hand luggage booked on the flight I had to pack the teapot and spoons in my teeny wheely case, the airport security must have thought I take tea drinking very seriously as they were x-raying my case.

I decided this new teapot called for its own special tea cosy- so to the sewing machine.

I used a large piece of paper to make a pattern by folding it around the teapot and drawing the rough shape I thought would work, I removed a notch from the top to create a rounded shape top once sewn.

I cut the template out and made adjustments as needed, for example, I had to shorten it.

Using the template I needed to cut out a total of 6 pieces-
2 pieces of outer fabric (patterned fabric in photo)
2 of the insulating layer (the black fabric in photo)
2 for the lining (deep pink fabric)
I actually used an extra insulating layer as I was “making do” with what I had to hand, the black fabric- a 100% wool felt and had it been a little thicker I would not have needed anther layer. I used a blue fleece, for a little extra warmth, on the back of the outer layer treating them as one layer i.e. I sewed the decorative pattern to both these layers as one.
For the main body of the cosy I picked a remnant of stone coloured fabric with a dark blue printed design of a plants and birds, I thought the folks at Downton would approve.
I used a zigzag stitch to machine sew a length of lace ribbon to each side of the outer layer approximately 5cm from the bottom.
I decided upon a teacup design, cut a template out of scrap cardboard, and picked a bright, fuchsia pink fabric which technically is actually a napkin- I bought these a few years ago in Primark for the ridiculous price of £2 for 4 large napkins, they were always destined for a sewing project in my house not their intended purpose. I used another napkin for the lining to match the teacup.
I used “Heat n Bond” to attach the teacup. “Heat n Bond” is amazing stuff and well worth having in your sewing arsenal. It has paper on one side and the mesh of bonding fabric on the other. First you iron it onto the fabric of you design, in this case my pink fabric, with the paper facing up. You draw your design on the paper; this can be done free hand or using a template as I have done. You can then cut it out. 
Once you have your shape, the paper is removed and the design is attached in place with an iron. I've always had nice strong bonds using “Heat n Bond” but I like to sew around the edge for extra strength but more importantly because it looks so much nicer.
As every project can be improved with a few buttons, I hand sewed some teeny ones onto the cup as polka dots. It occurred to me afterwards that I hadn't sewn on a saucer, Lady Violet would have been appalled! 
I repeated the same for the other side and that's the decorative part done. 
In part 2, to follow in a few days, the cosy comes together and the tea in the pot is kept nice and toasty, until then craft in earnest! Craftin' Ernest x

Friday, 2 May 2014

Zip-Up Pouch Tutorial

I think this is quite a simple make but with really effective results. They make great presents for girls to use as make-up bags or for guys as wash bags. They’re always handy for people with children/babies and you can knock them up in no time.
All you need is two pieces of fabric the same size- one for the outside and one for the lining, a zip (which is at least as wide as the width of fabric), pins, thread and a sewing machine.
The pieces of fabric needs to be twice as long as you'd like the finished length to be plus approx 1.5cm for seam allowance. The width needs to be the same as desired finished width plus 1.5cm seam allowance again.
So for a finished pouch 20 x 15cm, you will need two pieces of fabric 41.5 x 16.5cm.

Line up the edge of the zip with the edge of the outer fabric along one end, with the top of zip facing the right side of the fabric. Place the lining fabric on top of the zip and outer fabric so the right sides of the fabric face each other, pin in place.
Sew all three layers together along the edge.
Repeat with the other ends of the fabrics, attaching them to the opposite side of the zip.
This will result in a sort of figure of “8” shape with the zip in the middle joining the two pieces of fabric.

Fold the outer fabric layer back on itself over the lining fabric so the top of the zip and the right side of the outer fabric is on the outside. The next step is to pin the layers and top stitch along the zip. Open the zip and sew along each side of the zip, through the outer layer, zip and inner lining.
Refasten the zip and unfold the outer fabric so that you have the figure of “8” again. 
Flatten the two loops with the zip sandwiched between. You can have the zip in the middle but I personally prefer it towards one end so sandwich it off centre (for example with the zip 5cm from the fold).
Sew the layers together all the way along one side. On the other side sew almost together but leave a gap of about 6-7cm. I find it easier to leave the gap towards the centre to help with the finishing step, so I sew from one end inwards and then the other end inwards leaving the gap. If you have placed your zip in the centre I would definitely advise you leave the gap to one side of the zip rather than in the middle.
It’s then time to turn it out the right way through the gap and if necessary press everything flat (I'm normally too lazy for this step so it has to really need it for me to do it).
All that’s left is to sew the gap up by hand, firstly the lining through the gap in the outer fabric. Then sew closed the gap in the outer fabric using a hidden running stitch.
Admire your finished zip-up pouch! I would say a button or two as an embellishment never goes a miss ;-)

If you do make one, I’d love to see it.
Craft in earnest, Craftin’ Ernest x

Monday, 12 August 2013

Button-tastic Clock

This post involves something I had been meaning to make for a long time but had never gotten round to. Well, as is usually the case it took for me to have things I need to make, in order to get round to making something I wanted to make (and yep the things I need to make still haven't been done).

I really liked the idea of making a clock with buttons instead of numbers. I bought some clock mechanisms from the online store that has everything- good ol' Ebay. Unfortunately I used the mobile phone app and didn't look at the description properly so bought the wrong type of hands to the ones I wanted. Totally my fault but there's always a way round these things.

I used a piece of "wall art" I picked up for 50p in a second hand shop. I was going to use a blank canvas but this was very similar with a piece of hard board in the back and therefore already had support built in. With the help of my hubby I measured and drilled a hole in the centre of the picture for the clock mechanism to go through. It's amazing how keen he is to help when power tools are involved ;-)
I had some lovely Moda fabric: Lucy's Crab Shack by Sweetwater #5481 - Deep Sea Kite Ties www.modafabrics.com .I just love the colours especially the lime green so choose this colour for the buttons and the handles.
I'm usually a do-it-by-eye kind gal but this is one craft a tape measure/ruler and a protractor really is a must!
Firstly I drew around the frame on the back of the fabric making sure I had enough excess around the edges to fold over and cover the frame to the back. Then using the tape measure I placed an up-turned plate in the centre of the square and drew around that too. With the aid of the protractor I marked a dot at every thirty degrees from the top of the circle all the way around.
Hey presto, all that's needed it to sew a button to the right side of the fabric where each of the dots are and you have the twelve "hours". I used a vintage shank button for the twelve o'clock position and an assortment of holed buttons for the rest.
I used double sided sticky tape to attach the fabric to the frame. Getting the positioning right was actually the trickiest part and took a couple of goes but a necessity for accurate time keeping. I folded the corners as neatly as possible and used thumb tacks to hold them in place.
With a scalpel I carefully cut a hole in the fabric where the hole in the canvas was located and attached the mechanism following the manufacturer's instructions.
If I had been happy with the hands I had ordered all that would be involved now would be to lightly sand them and paint them the desired colour, again lime green, with nail varnish and fit them to the clock. However, as I messed up I had to do a few alterations first. Also I choose black ones and think if I had picked gold ones, the other option available, I could have skipped the sanding and gone straight for the nail varnish, another lesson learnt.
The hands I received were far more ornate than I had intended but as they were made from quite thin aluminium, I used some wire cutters to trim of as much excess as possible and to shorten them. I gave the edges a quick rub with sandpaper too to smooth them out. I'm rather pleased with how they turned out.
Again I followed the instructions to correctly attach the hands and popped in a (rechargeable) battery.
Now I can tell the time using buttons- perfect!
Until next time, craft in earnest! Craftin' Ernest x

Tuesday, 4 June 2013

Trip to Shrewsbury

It's June, officially Summer in the UK according to the Met Office and the Sun is shining!
We're just back from an overnight trip to the town of Shrewsbury in Shropshire, about two and half hours drive away. A friend recommended it as she thought we would like it, she wasn't wrong (thanks Lynda)! It's a truly gorgeous Tudor town, absolutely steeped in history. I love the higgled-piggled nature of Tudor buildings, so distinctively black and white, and around every corner was something of interest.

Shrewsbury is also a crafter's paradise! I bought so many goodies. We split our takings from last weekend's car boot sale and I spent all of mine on fabric, buttons and ribbon (plus a pair of shoes- I just couldn't say no and a vintage suitcase which was an absolute bargain at £4 in a charity shop).

We walked out of the hotel at 9am and by 9:20 I had bought so much fabric I was giddy. Next door but one to our hotel was an amazing shop- Watson and Thornton Fabrics and Haberdashery. Our hotel room window was the top, pointy-out one on the right side of the photograph above the arch and their front door was less than a stone's throw- yay!
And that was just half of it. The full front is below.
Here's a few pictures of the inside- including m lovely husband paying for all my purchases- there were lots and I didn't even see half of what they had downstairs let alone what was upstairs (apparently it was just as big up there).

Thankfully they have an online shop too
http://www.watsonandthornton.co.uk/ I will definitely be looking ordering from them in the future. To top it all off, the ladies who served us were so lovely and helpful and made it even more pleasurable, if that's possible?
Here's a picture of some of the fabrics I just had to bring home with me ;-)
And one of the feature buttons and ribbons I couldn't resist. Note the ribbon quoting Oscar Wilde "I can resist everything except temptation", so very true!
I'm looking forward to getting busy with some of it at the weekend. What to make? So many ideas, so little time. . . . 

Until next time craft in earnest, Craftin' Ernest xx

Tuesday, 9 April 2013

GIVEAWAY- Fabric Bundle and Vintage Buttons!


Hi there, today’s post will catch up on a few things and include the first giveaway!
In a previous post, I mentioned a small, oak table I renovated in a class with my Dad for my Mum. I didn't have a photo to hand at the time of that post but took a couple over the weekend. As I said before I don’t have a picture of it before we got cracking sorry. Just imagine a really black table barely recognizable as wood. A lot of elbow grease, a scraper, very fine wire wool and some furniture wax later…..voilĂ 


We had some bad news on the sheepskin front :-( Seven of the ten skins were rejected by the dresser (the person who inspects and prepares the skin) as the fleece was too long and some had begun to moult. Hard to believe in the weather we've been having! To look on the bright side, at least three are going to be tanned. It would have been heart-breaking if they were all unsuitable.
On Sunday I taught a crochet class to seven beginners that hopefully have caught the crochet bug- it’s awfully hard to resist! The all did really well and were super keen, I really enjoyed myself.

So on to the giveaway….........The prize is a varied bundle of 10x10cm fabric squares (approx. 85 in total) and 5 vintage, peach coloured buttons!
All you have to do is leave a comment on this post, send me a tweet @craftinernest OR email me on craftinernest[at]gmail[dot]com (fill in the "at" and "dot" as normal - I'm trying to avoid spambots) and mention BUTTONS. The closing date is Wednesday 17th April and I will pick a random winner on Thursday 18th April.
Best of luck and remember to Craft in Earnest!