Showing posts with label Jewellery. Show all posts

Tuesday, 15 December 2015

Efcolor Enamels (Low Temp Enamel Powders)

For Christmas a (good) few years ago I very happily received a small, secondhand, jewellery kiln and all the accoutrements required for a number of enameling projects. Sadly, I have only used it a handful of times for a few reasons... 
1. It cost a lot to run. 
2. It makes my husband very nervous (I had to buy a fire extinguisher to help alleviate his fears) 
3. I don't have a dedicated work space for it, so it takes planning to get out and to pack away etc (and basically I'm too lazy/disorganised for that).

I quite often feel a bit guilty/frustrated by this but I have recently stumbled across Efcolour Enamels on Cooksongold.com
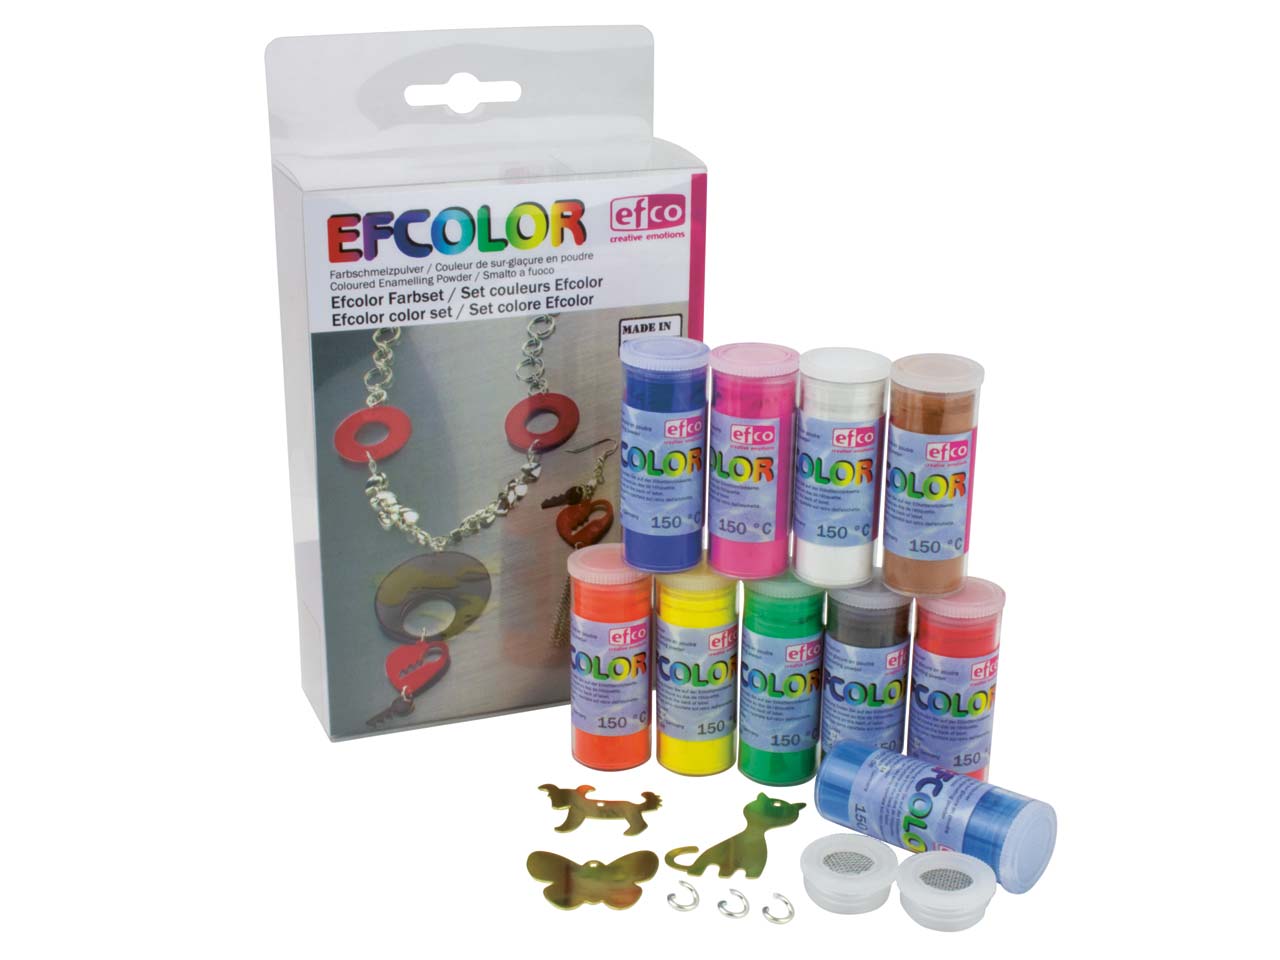
I treated myself to the starter set below and, boy, was I delighted that I did!! The stuff is fabulous. 
They are low temperature enamel powders that "fire" at 150°C, how amazing is that?!
The starter kit contains 10 x 10ml pots of different, brightly coloured powders, a couple of sieve tops that can be fitted directly to each pot and a few metal blanks.
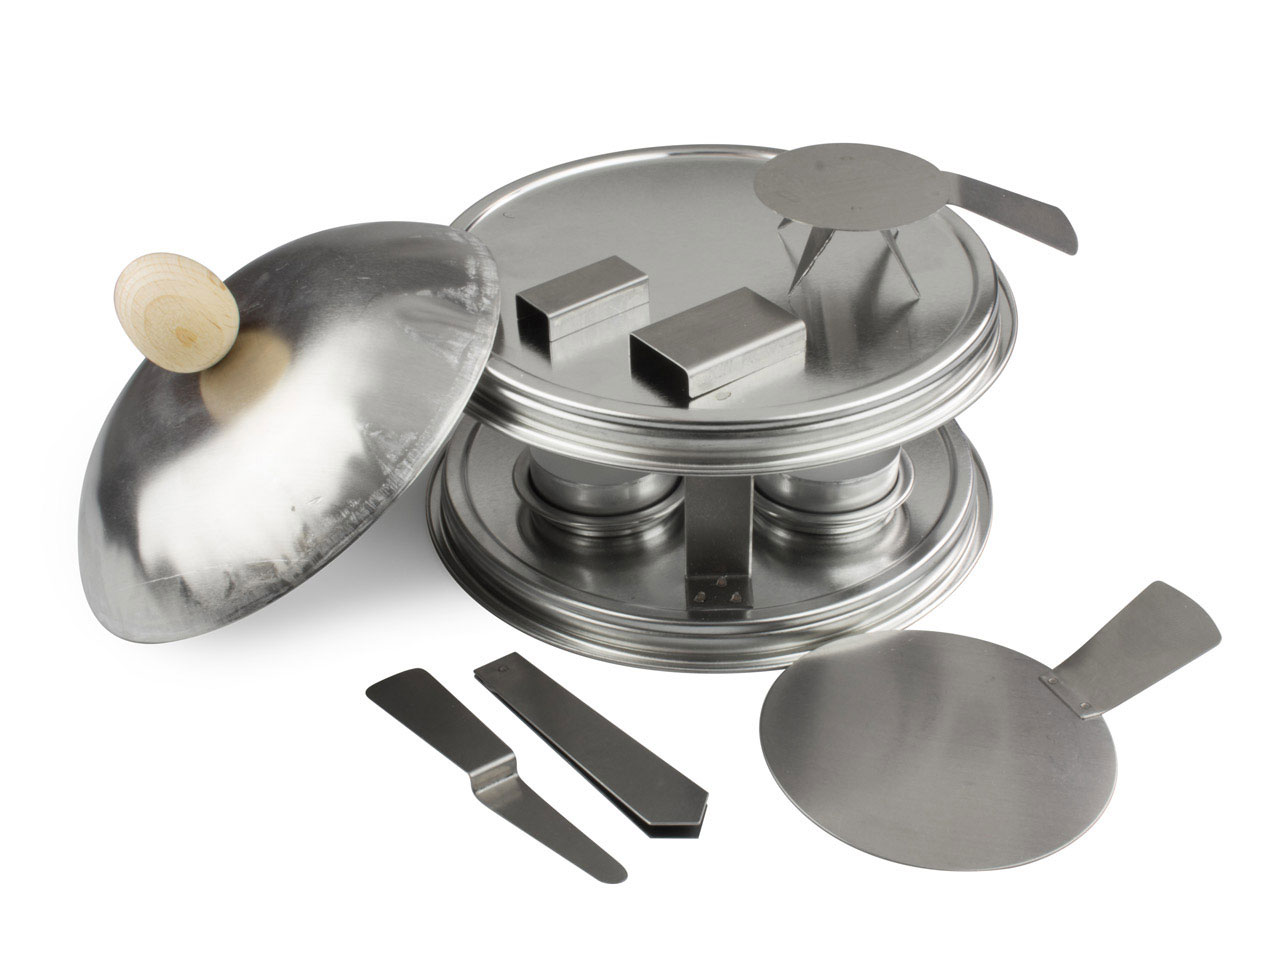
For my first project I used my kitchen oven but when I realised how great the stuff was I bit the bullet and bought the tealight stove - another purchase I certainly don't regret.
Here's mine after a few (very enjoyable) enameling sessions (with a glimpse of a scented tealight I used to add an extra level of pleasure)...
Another handy purchase was a packet of extra sieve tops as you only get 2 in the starter set, a few more come in useful as it saves having to clean them between powders when using a number of colours. One per pot would be the ideal but I have already spent enough so I'll make do for now.
They're easy enough to clean, the pic below shows one before cleaning and the others after the cleaning - I just used a dry cloth after tapping away the excess.
I've been a busy little beaver with the stuff and will share some things I've learnt and a few projects in upcoming posts. 
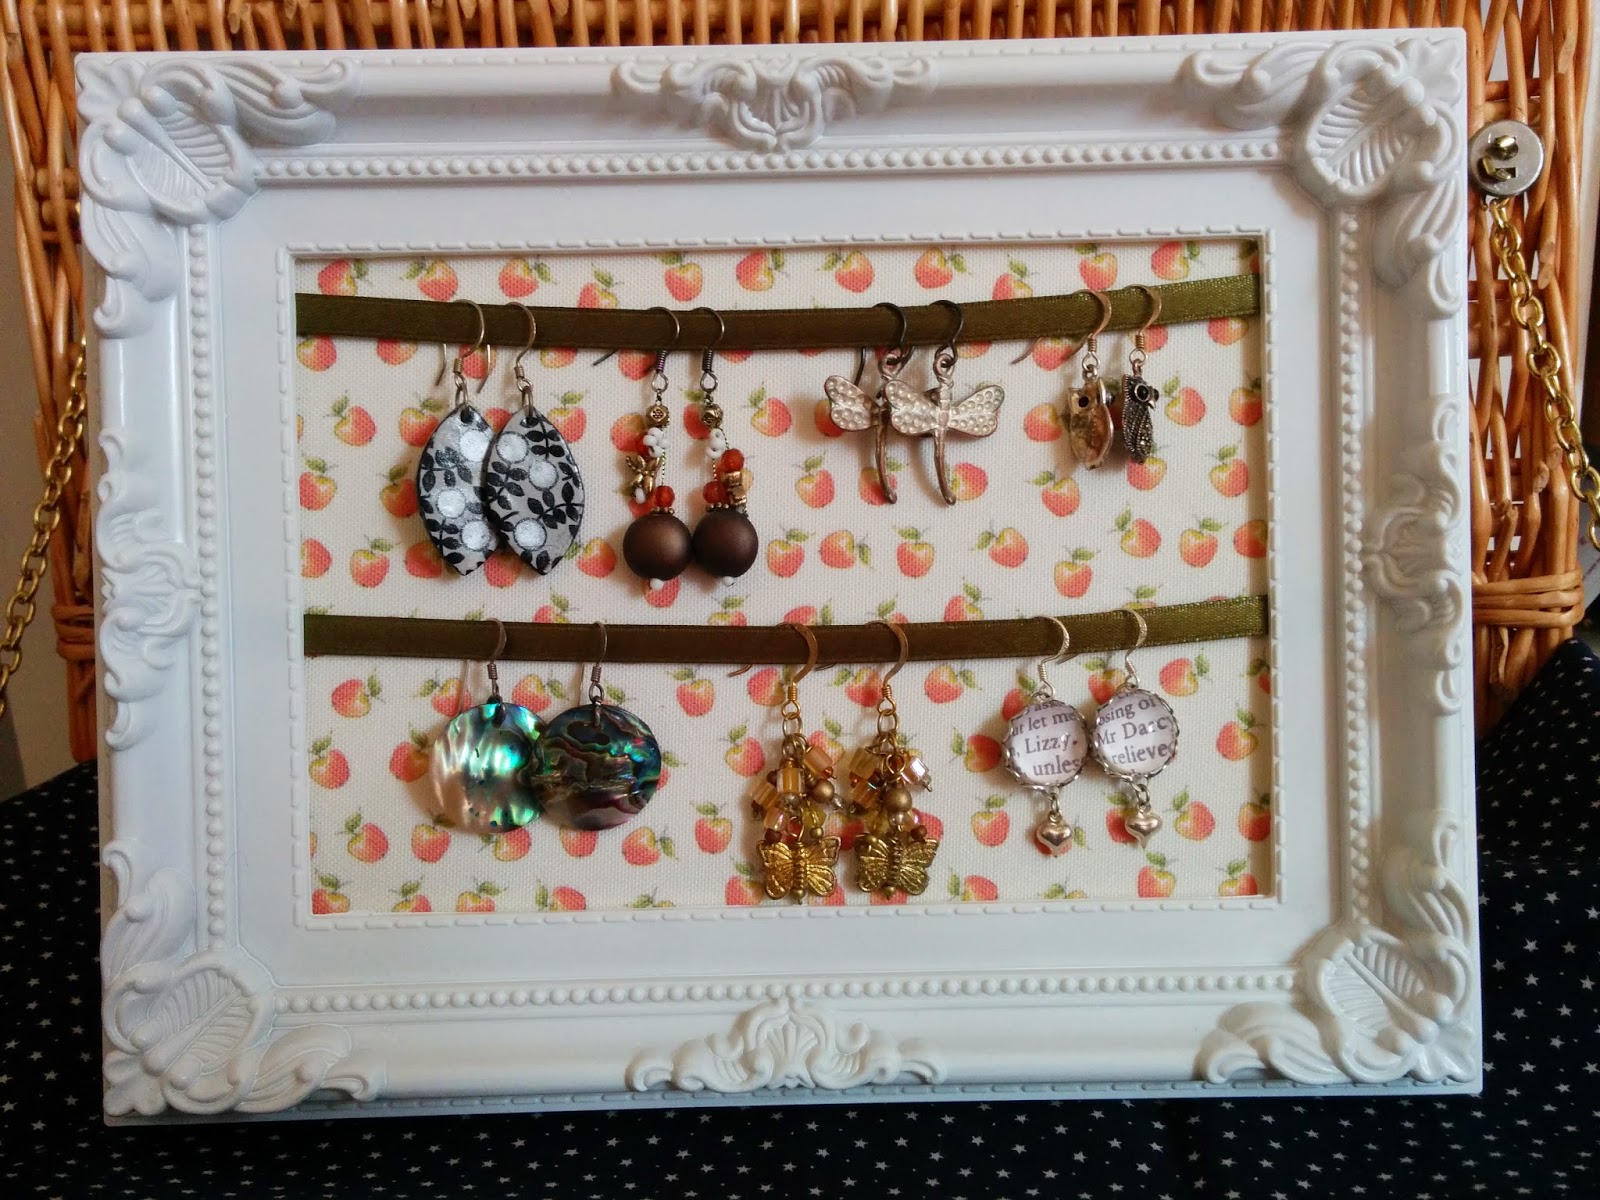
Just for comparison though - in the photo below, I made the top pair of earrings with "proper enamel" in the kiln and the bottom ones were made using Efcolor enamel.
As you can see the results are quite different but, in my opinion, both have their own pleasing qualities- would you agree?
Until next time, craft in earnest! Craftin' Ernest x


Monday, 13 April 2015

Brooches Stash

My husband and I decided to make the most of the sunshine the UK is experiencing at the moment and went out for dinner in our favourite cafe/bar/restaurant. Just as we were sitting down I realised the brooch I had being wearing was missing! Uh oh, this led to a panic and I ran off to retrace my steps. Thankfully I found it on the ground next to the car, I think it must have caught on my seat belt but I recovered it, phewee! It was this sparkly delight...

A few years ago I lost a real beauty on the way to a concert and even to this day when I walk the same route I look for it. My only consolation is imagining the delight on the lucky finder's face when they discovered it.
I've got a thing about brooches, I think they really are a nice finishing touch to an outfit, especially a blazer or summer cardigan. A lot of people I know see them as old fashioned and don't tend to wear them but that's definitely not me, anyway old fashioned is a plus in my eyes. 
As such I have a lot of brooches and some are really special to me so I thought I'd share a few of my favourites with you, they are either very sentimental to me or I just love the design but a lot of the time it's actually both.

As all my family know how much I like them I was very lucky to get my Grandma's collection when she passed away and these are very dear to my heart. 
This one I simply adore even though it's a little damaged but to me that just shows it has a history. I love the design and colour but most of all I love that my dad said he remembers his mum wearing it when he was young.

This next one was a present from one of my truly best friends, she gave it to me for making the place settings for her wedding. She knows me so well as I couldn't have picked better myself, it was such a delightful surprise.

This one I've mentioned before, my husband bought it for me because I love bumblebees. Again, this one has "history" as I dropped it the day after receiving it (so like me) but thankfully it was a clean break and could be glued, otherwise I would have been heading straight back to the shop.

This is a fun one that was originally a child's hairclip but thanks to a pair of pliers, some glue and a brooch finding, it has a new purpose.
Tortoises are another favourite of mine (none more so than my actual tortoise Evie) and as such I have numerous ones, many of which were gifts.

This one a good friend of mine bought for me as a souvenir when we visited San Francisco Zoo, sadly we're no longer in touch but it brings back very fond memories of a wonderful Summer.

On the subject of animals, birds make numerous appearances in my brooch selection, especially owls. Oh and insects too for that matter.
OK, this was supposed to be a quick post but I could go on and on so I'm going to stop here. It has occurred to me though that they could be displayed a little better so I can enjoy them even when I'm not wearing them rather than sticking them in a box. That's my next project sorted...
Until next time craft in earnest, Craftin' Ernest x

Tuesday, 2 September 2014

Crochet Ringed Necklace Tutorial

I can't believe it's September already, time is just flying by! However, as it's my favourite month I don't mind too much. Whilst the weather has actually taken a change for the better with the Sun shining brightly, the colours of the leaves have started to change and Autumn is certainly on it's way. Before I get cracking on the big woolly scarves and hats I thought I would make something a little more delicate....
I've seen necklaces similar to this a few places and really like them. So when I stumbled across an assorted pack of rubber o-rings for 99p in the hardware section of my local Wilkinson's the other day, I immediately knew they'd be just the thing I needed to make my necklace. As they vary in diameter and thickness I thought they'd provide the perfect, varied base rings and they are flexible but hold their shape, also they weigh next to nothing so the necklace would be nice and light.
I'm afraid I didn't take the picture until after I'd opened and removed the o-rings I was going to use- sorry dopey me!
What you need:
O-rings (or similar for you base- you might find something you prefer/better)
Embroidery cotton or fine yarn
Small crochet hook
Sewing needle
Scissors
Chain, jump-rings and fastening e.g. lobster clasp
Pliers
A couple of beads are optional but do make a nice addition in which case a small amount of coordinating wire is also needed, together with round-nose pliers and wire-cutters.


I decided to use 7 of the rings (I always think odd numbers work best for this sort of thing) so I chose the same number of different embroidery cottons to use. I picked 7 colours I liked the look of together and that I thought would go with a range of my clothes. My favourite colour to wear is navy so that was my starting colour and I went from there. Alternatively you could use just one colour or different shades of the same colour might give a nice finish too?

Once I had decided on the colours I arranged the o-rings to a rough layout I liked and started to crochet.
Throughout I used double crochet (dc) with a 2.5mm hook and treated the o-rings as a chain ring and crocheted into the "chain space". Obviously the number of stitches required varied depending on the size of the o-ring but I kept pushing the stitches tightly together to make sure you couldn't see any of the black rubber. 
Once I had completely finished the round and was happy there was no gaps I joined the last dc to the first dc with a slip stitch.
At the end of the round I left a long tail of cotton on each ring to use to sew the rings together. 
I did this by sewing a few crochet stitches from two rings together with the tail from one then pulling the thread through a few of the hoops around the ring and cutting off the excess.
I repeated this step with each ring being sure to keep the arrangement of the rings on the design I decided up. The tail of the final ring isn't needed so I sewed this into the hoops of the ring as previously and again cut the excess.
Once all the rings are sew securely together you just need to add the chain. This can be done by attaching a jump ring to the upper, outer edge of the two end rings, going though the top of a single crochet stitch and the end of the chain (see * below as with the beaded step). Then attach the clasp to the other ends of the chain also using jump rings.
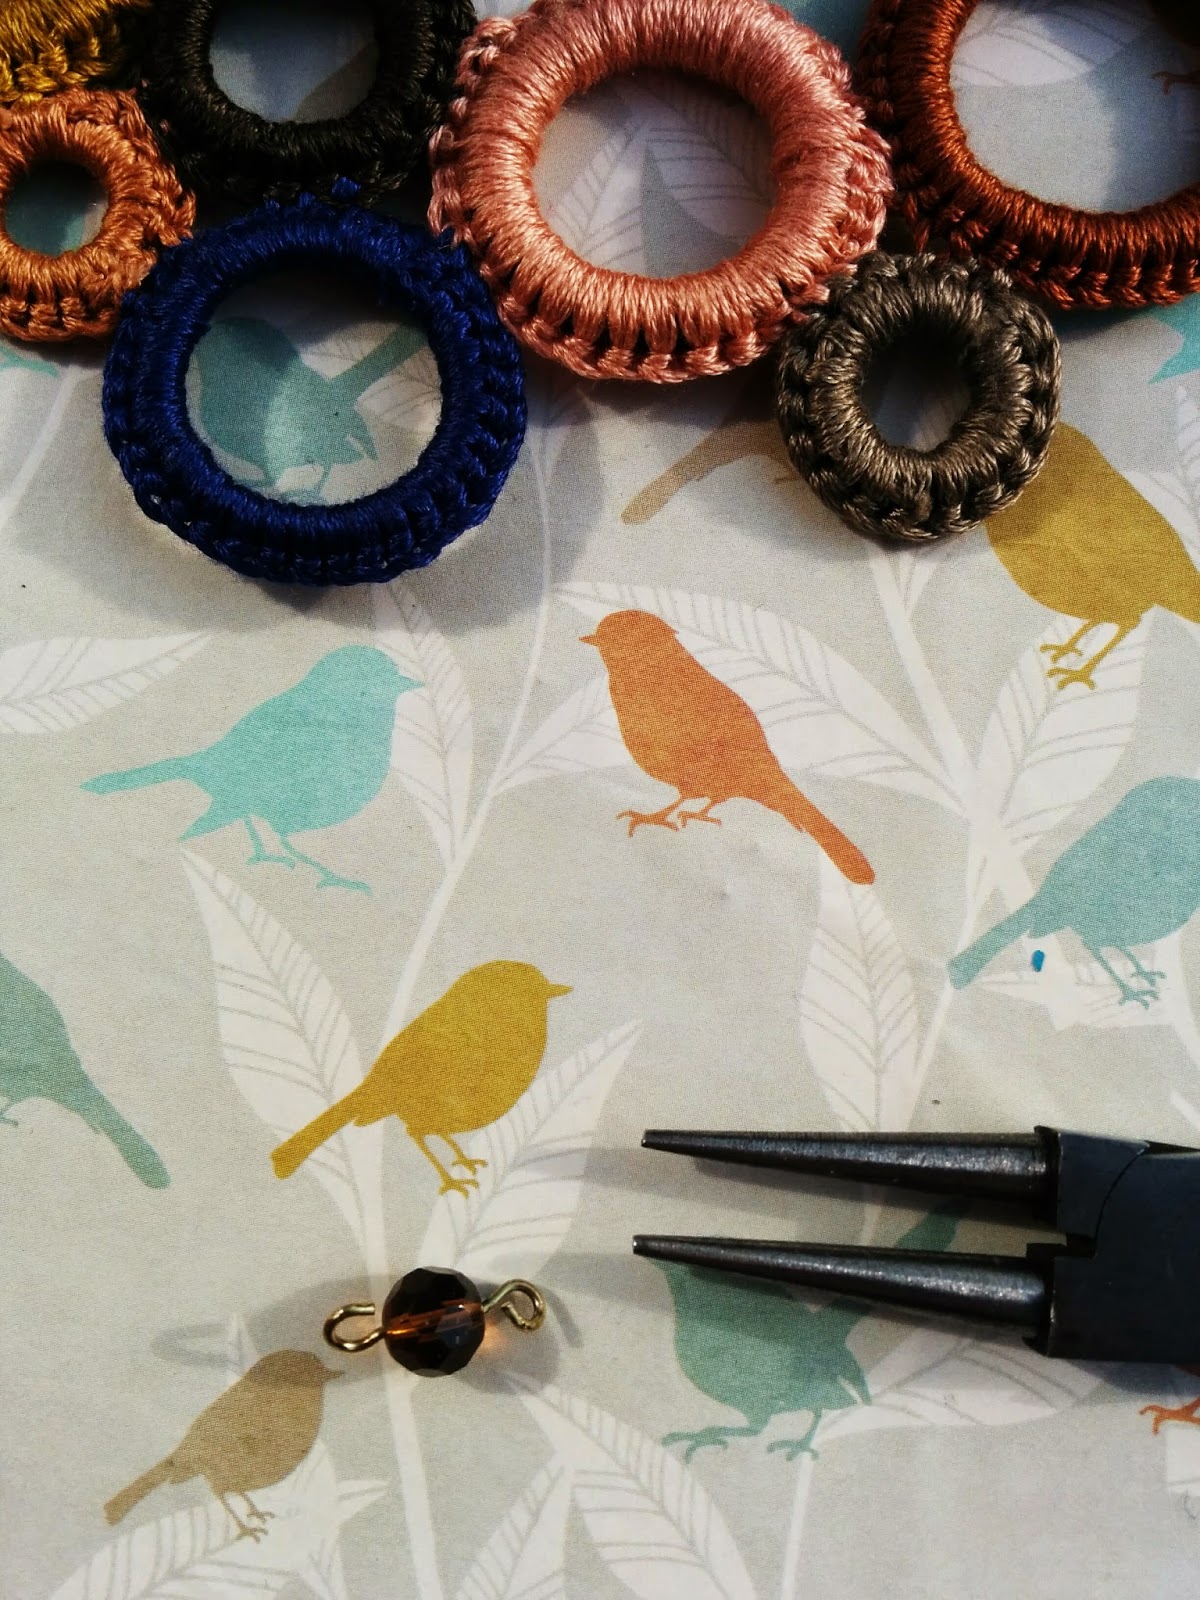
If you decide to add beads, thread one onto wire and create a loop either side of the bead with the round-nose pliers. 
Attach one of the loops to the crochet stitch on the ring as with the jump ring and the other loop to the chain. Finish as before.
*If using a jump ring insert as above and attach the chain directly
All done! I'd love to know if you make one yourself. 
Thanks so much for taking the time to read my blog, I really appreciate it!
Until next time craft in earnest, Craftin' Ernest x
Friday, 22 August 2014

Framed Earring Stand

Hello! Summer has turned decidedly wet in South Wales and cold too. I am wearing lots of layers today :-( and I'm missing the sunshine but on the bright side, it is a great excuse to stay inside and craft!
This means I finally finished knitting the top I started a couple of months ago. I treated myself to the kit for the Juliet Tee from We Are Knitters' website and just adored the the colour and texture of the cotton yarn when it arrived, it's incredibly soft and the colour (wine) is so sumptuous. 
It was a little bit a labour of love as it included 248 rows of moss stitch- not one of the quickest stitches to knit to be fair. Also, if I'm making an item for myself it often drops to the bottom of the list as I feel guilty putting something for myself above something for others. I very much doubt that's just me?!
I also suffer from the problem that if I spend a long time on something it has to be exceptional to live up to the effort .
On the other hand the following item took almost no time at all & cost very little- an earring display stand made from a frame that I picked up in a Poundland store for the somewhat unsurprising cost of £1. However, a second-hand frame from a charity shop or vintage fair would work just as well/even better.
The glass can be discarded (by that I mean added to the pile "stuff I will find a use for at a later date". Yes it is ever growing pile with the definite possibility of taking over one day).
Cover the back section of the frame i.e. the section with the stand attached. I used adhesive backed fabric but decorative paper or regular fabric would be fine and just apply the glue to the back before applying the paper/fabric or double sided sticky tape could be used.
It's hard to see but the fabric is being stuck to a chipboard back
Then attach lengths of ribbon across the frame in the orientation you wish your frame to stand. I decided on landscape so decided on 2 lengths of ribbon. If I had chosen portrait I perhaps would have done 3 rows.
Attach the ribbon to the inner edge of the frame as shown in the photograph. Normally I would do this with a stapler but as this frame is plastic I used extra strong double sided tape. I attached the top one about half a centimetre from the top and the second about half way between the top one and the bottom edge of the frame.
Insert and the back as usual and hang your dangly earrings proudly on display!
A simple but effective way to display your earrings that looks rather pretty in my opinion.
Thanks for having a look!
Craft in earnest, Craftin' Ernest x


Wednesday, 21 May 2014

Washi Tape Embellished Necklace

I'm really loving all the statement necklaces that are so popular at the moment, there are some really bold ones available. I recently bought a silver coloured necklace very cheaply (from Primark, well actually Penney's as I bought it in Ireland) with the sole purpose of jazzing it up a bit and thought washi tape would be perfect to do just that.
The necklace consists of three crescent-shaped pieces attached to a single section on each side, these in turn are attached to a length of chunky chain. The front sides are smooth with a slightly beaten look while the reverse side has a ridged lip around the edge and textured surface.
Front
Back
I decided to add some colour to each of the crescents which graduate in size, getting slightly bigger as you go down, and decided to do this to the reverse side so I could easily apply a resin coat thanks to the lip.
The first step was to use flat-nose pliers to open the jump rings attaching each crescent and removing them but keeping them safe.
I then used some paper and a pencil to create a template for each of the crescents by tracing them as best as possible, cutting them just short of the hole on each side. 
This is what I stuck the washi tape to, I attached short sections of tape completely covering the paper surface, I then trimmed off the excess. Repeating the process 3 times, once for each section.
I used three different tapes which I liked the look of together. You could do complimentary patterns/colours, contrasting patterns/colours, all the same- what ever takes your fancy!
I then glued each one in place to the corresponding section using epoxy glue. After this I coated each crescent in clear resin (here's a link to a previous resin post of mine:  http://craftinernest.blogspot.co.uk/2013_09_01_archive.html)
Once this was thoroughly dry I used the original jump rings to reattach each crescent but the reverse side out, creating a totally unique accessory. 
All that was left was to wear it with a big smile on my face :-D 
Hope you like the result? Keep crafting in earnest, Craftin' Ernest!

Wednesday, 23 October 2013

Darker Evenings Are On Their Way!

We're already the majority of the way through October. I feel every time I write I'm flabbergasted how quickly the time has flown by. The clocks go back this weekend too so the evenings will be darker- the prefect excuse to stay in wrapped up warm with some crafty project on the go. So much wool and so little time
Last Saturday I had a stall at an Autumn Craft Fair and my recently made clocks got their first outing and I'm delighted with the response. Such lovely feedback, people can be so generous. I've sold 5 and have orders for 2 more so will have to get busy making them, luckily buttons are not in short supply in my house ;-)  I made a few with applique features and I'm quite pleased with the end results and I have ideas for more buzzing round in my head.
From November the Christmas Craft Fairs start full swing with three booked already so, of course, I have to make, make, make in preparation.
I've been making bridal accessories too but can't show the end result until the bride herself sees and is happy with the result. Hopefully I'll be able to blog about it soon.
Also I have started on my first Chrimbo tutorial but I will share that closer to the festive period. Not long now!

Until next time craft in earnest, Craftin' Ernest xx

Sunday, 29 September 2013

Resin8

Yesterday I attended a one day course in resin jewellery run by resin8.
http://www.resin8.co.uk/
I had seen them demonstrate at a craft show in Cardiff I had attended a couple of years ago. I bought a few things off them, including a button mould! However, I wasn't overly confident about using the stuff. So my yummy hubby bought me the course for my birthday as they're workshop is only an hour away from where we live in Winchcombe, North Gloucestershire, a really beautiful and unspoilt, quaint little town.
The course was run by Resin8's Clare John, what she doesn't know about resin isn't worth knowing. You can watch her do her magic on YouTube....
http://www.youtube.com/watch?v=_ntPY5jljjc
I really enjoyed the day and learnt so much. I had a lot of fun experimenting and made SIX different items. We were shown a number of different techniques to try, all were great learning experiences.
Due to the time constraints it was not possible to completely finish each piece with a doming layer on top. I think this really finishes a piece off so I bought some "doming resin" and, with the confidence I gained yesterday, I completed them at home today! You can buy everything you need from their website.
One item wasn't set enough to transport home so I have the excitement of it arrivng at some point in the post.
The course also included lunch, we had a truly delicious homemade soup and chunky wholemeal bread, it really fuelled our creativity and kept us going. I would highly recommend attending if you want to learn about resin
I'm really looking forward to making more and experimenting with the techniques and making buttons inset with buttons! There's so many different things to try....

Until next time, craft in earnest. Craftin' Ernest x

Monday, 10 June 2013

Heart-shaped Earring Tutorial

Today's post is a tutorial to make a pair of HEART-SHAPED EARRINGS using wire and embossing powder. They're actually surprisingly easy to make and I think look really effective. 
You will need:
2 x approx 45cm (18") of thin wire. 24 gauge works well but a bit thicker or thinner would work fine (I used a brassy coloured wire but you can use whatever colour you like).
Embossing powder (I went for classic red but again it's totally up to you. The brand I used for these was "Heat It Up" but I've used "Cosmic Shimmer" in the past and I'm pretty sure it would work with any brand)
Pair of earring findings (homemade or shop bought) 
Regular kitchen oven
Baking tray (or oven-proof dish)
Aluminium foil
Pliers and wire cutters
Hammer and hard surface
Paper and pen
Sharp needle/pin

Draw a heart onto the piece of paper roughly 2.5cm x 2.5cm (1" x 1").
Bend the end of one of the lengths of wire into a heart shape using the heart you drew as a guide. Using pliers fold the tip of the end around the wire to secure it.

Twist and weave the remaining length of wire around the heart-shaped frame using the pliers when needed.

Keep wrapping until you're happy the heart has been "filled in" evenly. Repeat with the second length of wire.
Then using the hammer and a hard surface, gently hammer both hearts flat.
Left-side heart = after hammering    Right-side heart = before hammering

Lay both hearts on a piece of foil on a baking tray (or oven-proof dish), not too close together.

Now cover the hearts with a thick, even layer of embossing powder. Originally I used a small teaspoon and applied the powder a little at a time using the tip of the spoon, this worked well but took a little while. I find it quicker to use the piece of paper rolled into a funnel. Pinch the end, closing the hole and pour in the powder. Gently release the pressure on the hole allowing powder to flow onto the heart. Repeat for the second heart.

Place the tray in an oven set to about 150°C (300°F) for a minute or two. The powder melts pretty quickly so keep an eye on it. Once all the powder has melted and become shiny, remove the tray from the oven and leave it to cool.

Once it's cool enough to touch gently peel away the foil. If needed, any excess around the edges can simply be cut away with a pair of scissors
 Before trimming the edges
After trimming

Using a sharp needle/pin, and being careful of your precious pinkies, pierce a hole in each heart- in the left side of one and the right side of the other.

Attach an earring hooks to each heart and you're all set!

I hope you like them and give them a go!
'Til next time craft in earnest, Craftin' Ernest x