Showing posts with label Necklace. Show all posts

Tuesday, 9 June 2015

An Easy To Make Button Necklace

On a recent trip to the picturesque city of Wells (the details of which can be read here). I picked up a tin of buttons from a charity shop. On a side note - it was a Quality Street tin which in my experience is by far the nation's favourite container to home buttons once the chocs have gone, as such if I see the familiar glimpse of white and pink in a charity shop or car boot sale my heart does begin to flutter.
Among the treasure inside the tin were these 5 buttons...
They're leather with small sections of thin wire for decoration. They are shank back buttons where the actual shank is a puffy circle of fabric protruding from a hole in the back. There's probably a technical name for them but I don't know it.

Anyway, I thought they'd make an interesting statement necklace so decided to give it a go and it was dead simple.

You will need:

Large buttons- shank ones are good for this but not essential, holed buttons will work
Strong glue (e.g. E6000)
Chain with fastening (e.g. a lobster clasp)
2 jump rings
Pliers (to attach jump rings)

I arranged them until I was happy with the look of them, basically a downward v shape.
I removed the the fabric shanks with scissors.
I then glued them by overlapping so that the bottom button (the point of the v) is lowest, the adjacent two are glued on top on the lowest one. I also put a spot of glue between the edge of these two sticking them together for a bit of extra strength. Then I glued the uppermost two onto the middle two.
I wrapped them with low adhesive tape while the glue dried completely (I left them 24 hours in this instance). Once I was happy they were securely stuck together I removed the tape.
It's then just a case of attaching the chain.
To keep it simple, I just attached a jump ring to each end of chain and glued one to the back of one of the uppermost buttons and the other side to the opposite button.
Again leave to fully dry and then you're all done!
What do you think? Not bad for for a simple make with unusual buttons in my opinion. I'll update with a photo of it being worn when I don't look like I've been dragged through a hedge backwards ;-)
Until next time, craft in earnest! Craftin' Ernest x

Tuesday, 2 September 2014

Crochet Ringed Necklace Tutorial

I can't believe it's September already, time is just flying by! However, as it's my favourite month I don't mind too much. Whilst the weather has actually taken a change for the better with the Sun shining brightly, the colours of the leaves have started to change and Autumn is certainly on it's way. Before I get cracking on the big woolly scarves and hats I thought I would make something a little more delicate....
I've seen necklaces similar to this a few places and really like them. So when I stumbled across an assorted pack of rubber o-rings for 99p in the hardware section of my local Wilkinson's the other day, I immediately knew they'd be just the thing I needed to make my necklace. As they vary in diameter and thickness I thought they'd provide the perfect, varied base rings and they are flexible but hold their shape, also they weigh next to nothing so the necklace would be nice and light.
I'm afraid I didn't take the picture until after I'd opened and removed the o-rings I was going to use- sorry dopey me!
What you need:
O-rings (or similar for you base- you might find something you prefer/better)
Embroidery cotton or fine yarn
Small crochet hook
Sewing needle
Scissors
Chain, jump-rings and fastening e.g. lobster clasp
Pliers
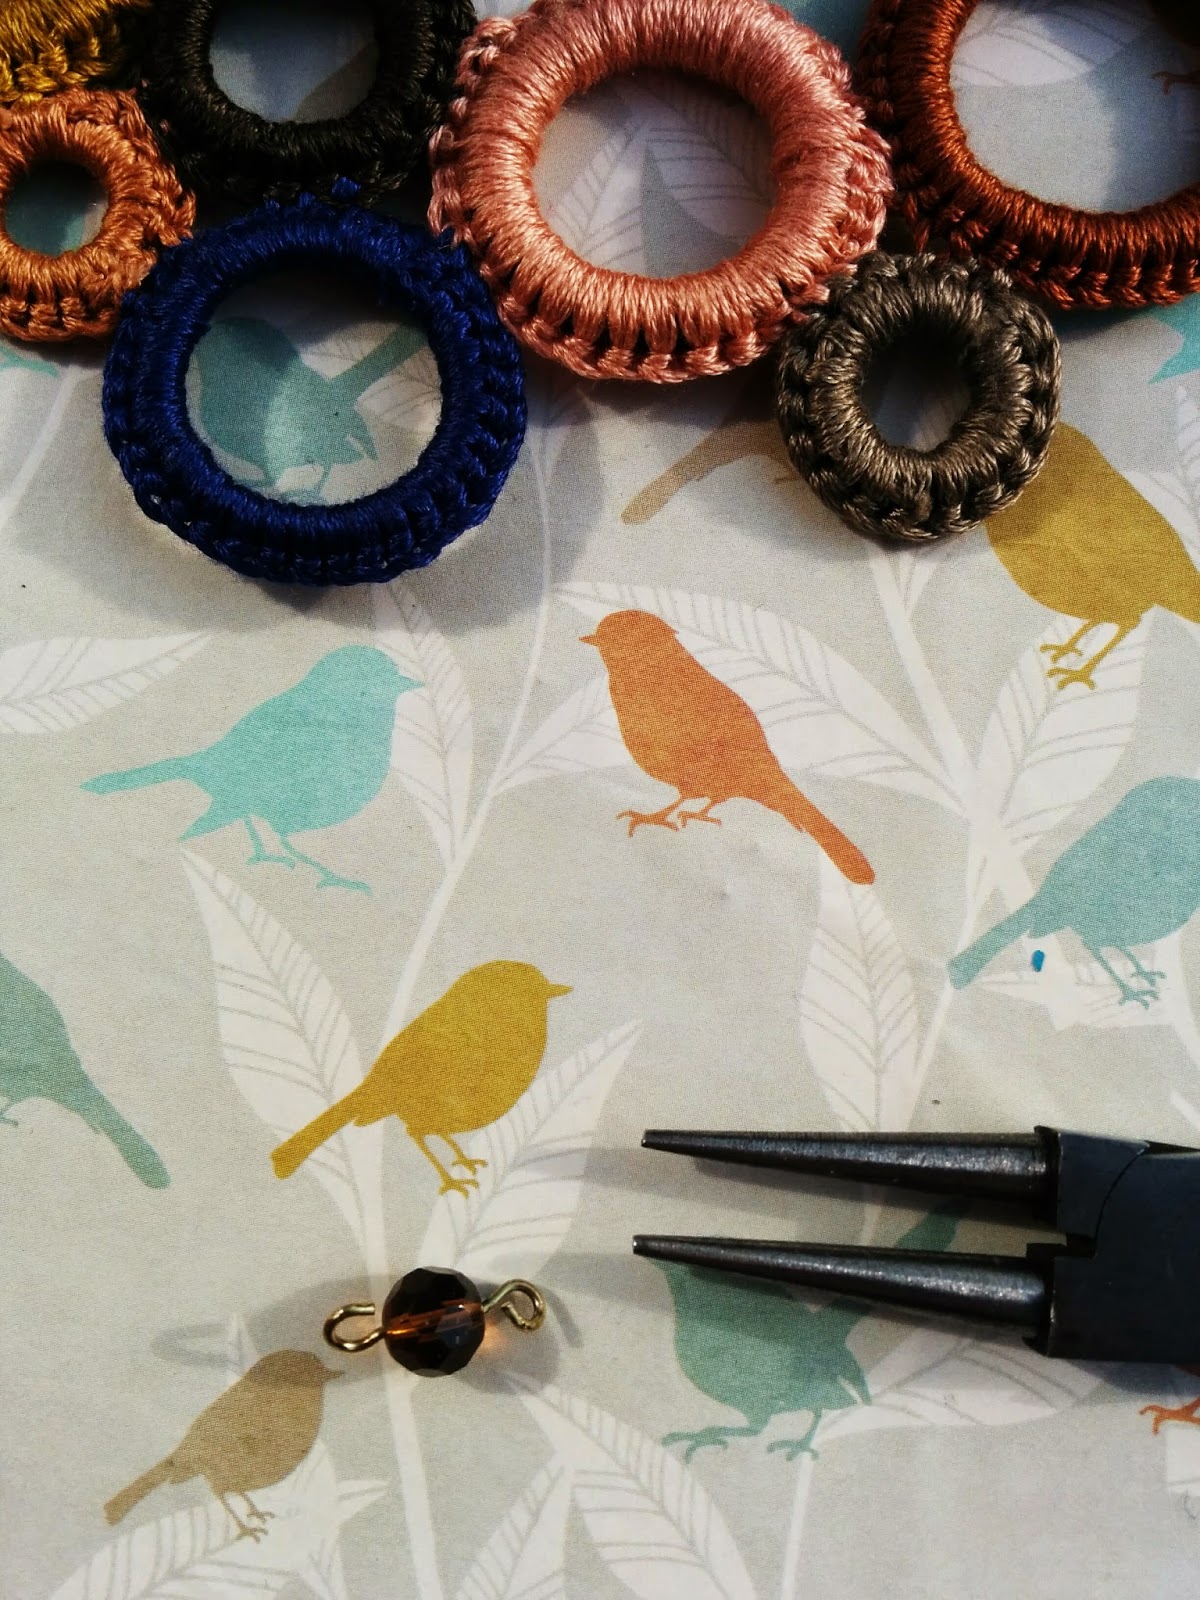
A couple of beads are optional but do make a nice addition in which case a small amount of coordinating wire is also needed, together with round-nose pliers and wire-cutters.


I decided to use 7 of the rings (I always think odd numbers work best for this sort of thing) so I chose the same number of different embroidery cottons to use. I picked 7 colours I liked the look of together and that I thought would go with a range of my clothes. My favourite colour to wear is navy so that was my starting colour and I went from there. Alternatively you could use just one colour or different shades of the same colour might give a nice finish too?

Once I had decided on the colours I arranged the o-rings to a rough layout I liked and started to crochet.
Throughout I used double crochet (dc) with a 2.5mm hook and treated the o-rings as a chain ring and crocheted into the "chain space". Obviously the number of stitches required varied depending on the size of the o-ring but I kept pushing the stitches tightly together to make sure you couldn't see any of the black rubber. 
Once I had completely finished the round and was happy there was no gaps I joined the last dc to the first dc with a slip stitch.
At the end of the round I left a long tail of cotton on each ring to use to sew the rings together. 
I did this by sewing a few crochet stitches from two rings together with the tail from one then pulling the thread through a few of the hoops around the ring and cutting off the excess.
I repeated this step with each ring being sure to keep the arrangement of the rings on the design I decided up. The tail of the final ring isn't needed so I sewed this into the hoops of the ring as previously and again cut the excess.
Once all the rings are sew securely together you just need to add the chain. This can be done by attaching a jump ring to the upper, outer edge of the two end rings, going though the top of a single crochet stitch and the end of the chain (see * below as with the beaded step). Then attach the clasp to the other ends of the chain also using jump rings.
If you decide to add beads, thread one onto wire and create a loop either side of the bead with the round-nose pliers. 
Attach one of the loops to the crochet stitch on the ring as with the jump ring and the other loop to the chain. Finish as before.
*If using a jump ring insert as above and attach the chain directly
All done! I'd love to know if you make one yourself. 
Thanks so much for taking the time to read my blog, I really appreciate it!
Until next time craft in earnest, Craftin' Ernest x

Wednesday, 21 May 2014

Washi Tape Embellished Necklace

I'm really loving all the statement necklaces that are so popular at the moment, there are some really bold ones available. I recently bought a silver coloured necklace very cheaply (from Primark, well actually Penney's as I bought it in Ireland) with the sole purpose of jazzing it up a bit and thought washi tape would be perfect to do just that.
The necklace consists of three crescent-shaped pieces attached to a single section on each side, these in turn are attached to a length of chunky chain. The front sides are smooth with a slightly beaten look while the reverse side has a ridged lip around the edge and textured surface.
Front
Back
I decided to add some colour to each of the crescents which graduate in size, getting slightly bigger as you go down, and decided to do this to the reverse side so I could easily apply a resin coat thanks to the lip.
The first step was to use flat-nose pliers to open the jump rings attaching each crescent and removing them but keeping them safe.
I then used some paper and a pencil to create a template for each of the crescents by tracing them as best as possible, cutting them just short of the hole on each side. 
This is what I stuck the washi tape to, I attached short sections of tape completely covering the paper surface, I then trimmed off the excess. Repeating the process 3 times, once for each section.
I used three different tapes which I liked the look of together. You could do complimentary patterns/colours, contrasting patterns/colours, all the same- what ever takes your fancy!
I then glued each one in place to the corresponding section using epoxy glue. After this I coated each crescent in clear resin (here's a link to a previous resin post of mine:  http://craftinernest.blogspot.co.uk/2013_09_01_archive.html)
Once this was thoroughly dry I used the original jump rings to reattach each crescent but the reverse side out, creating a totally unique accessory. 
All that was left was to wear it with a big smile on my face :-D 
Hope you like the result? Keep crafting in earnest, Craftin' Ernest!

Friday, 28 February 2014

Jet Setting Part 2 - Ireland

After the delights of Poland we headed for our annual February trip to see the family in Ireland (see last year's February post here- http://craftinernest.blogspot.co.uk/2013/02/ernest-in-ireland.html).
As always it was great to see everyone especially as we only made one trip over last year. We flew straight from Krakow to Dublin, then drove west to Limerick in a hire car- here's a handy hint for those not familiar with saloon cars- the don't have rear windscreen wipers so don't go ask the guys in the hire office how to turn them on, you will look silly ;-)

Shopping was once again on the agenda, we concentrated on culture last year after all. We even had to buy another suitcase, definitely a sign of a successful trip! I finally made it into a shop that had caught my eye previously but didn't have the time then to go in, The Art and Hobby Shop: https://www.facebook.com/artnhobbylimerickcity
I'm very glad I got to go in! I bought lots of bits and bobs- a large circle cutter, a set of fabric pens, more washi tape (yes I certainly have fallen in love with the stuff), some ribbon, ink pads and a pack of resin flowers.
I had earlier picked up a a necklace and earring set at the knock-down, bargain price of 1 euro and thought it would be good to use with one of the resin flowers.
Using pliers I removed the horse-shoe charm and replaced it with a small metal disc with a hoop I already had (it was from a long necklace with lots of them dangling off it). All I had to do then was glue one of the flowers to disc. I don't think it looks too bad at all for about 1.30 euro?
My aunt Maxine gave me a chunky green cardigan she knitted, perfect to keep me snug in the evenings! She's very good.
All in all it was a truly fantastic week and I could do with another week off to recover!
Until next time, craft in earnest! Craftin' Ernest x

Wednesday, 21 August 2013

Statement Kumihimo Necklace

Have you ever liked something so much you decided to make it in every colour? That's what's happened with this necklace.
I bought a jazzy, beaded belt from a charity shop for the beads as it was completely chocked full of them. As a belt it wasn't to my taste but I decided to take it apart and make something new and that led to the first necklace. Then it was a case of making one in each of the colours ;-)
As I have mentioned before, I really enjoy Kumihimo weaving, the basic method is quite simple to pick up and once you've got it it's very quick and a little bit addictive. That's before you even start to use beads, then it takes on a whole new dimension. I have a foam Kumihimo "loom" from Beadsmith and it's brilliant. They're quite cheap, less than £4 (UK) and can be used with everything from nylon thread to chunky wool! They come with instructions and you can also buy kits that include the materials to make your first project.
I have seen people make they're own using cardboard but I think the foam one helps as it holds the strands well.
Here's great link to a video direct from Beadsmith on YouTube which is fantastic if you're new to using beads with Kumihimo - http://www.youtube.com/watch?v=utQVPP7ky2g 
It's how I learnt to add beads and explains the technique perfectly! I also have the Beadsmith bobbins as seen hanging down from each thread in the photo below but prior to owning them I just used cardboard bobbins such as used with cross-stitch cotton.

Make a length of beaded Kumihimo weaving approximately 12cm (5") in length.
Wrap your chosen coloured wire around something of a suitable diameter. For example I use knitting needles as I have a lot of them to hand and I can use whichever diameter I think best suits each particular necklace. The picture below is a 5mm needle which is my standard go-to size. You can wrap it as tightly as you like. Sometimes I do it pretty tight but a little loose as in this example looks good too.
Wrap it until you have a coil approximately 3cm (1") long
Thread 3 beads and your wire coil onto a length of wire and create a loop at the end. Hook this onto the end of your beaded Kumihimo. (From the second necklace onwards I actually put a jump ring on the end of the beaded section before I started and one after I finished weaving to make things easier. If you do this hook the length of wire to the jump ring.) Then create a loop at the opposite end, where the beads are, and cut the excess off. Secure the end of the loop inside the last bead.

Thread a length of chain through the loop to create a double layer of chain.
Attach a jump ring the both ends of the chain.
Attach an extension chain to one side and a lobster clasp to the other side.
That's it ready to wear!
As I said I have made it in lots of colours thanks to the belt and a few more with other slight alterations :
I hope you like them too!
Craft in earnest, Craftin' Ernest x