Tuesday, 30 September 2014

Learning to Crochet & Finishing a Long Forgotten Jumper

I realised over the weekend I learnt to crochet just over eight years ago now!
I used the book, "Good Housekeeping Crochet" which I had bought in a charity shop. It is still available second-hand from Amazon here and I've just noticed it's almost the same age as me (first published in 1981). I think it's great (as do both people who gave it 5* reviews on Amazon) and still regularly refer to it if I'm looking for a stitch. It doesn't contain patterns for items, it's more a directory of stitches and gives examples of things each stitch may be good for and suggested yarn, etc.

The first book I bought which contained patterns for finished items, just after I had mastered the basics, was "Chicks with Sticks Guide to Crochet" by Nancy Queen & Mary Ellen O'Connell. I bought it whilst in Ireland for my Grandma's 80th birthday party, she would have turned 88 last weekend so I know it's been eight years.
This book also has a good "how-to" section and discusses different yarn types etc. However, it is an American book and as such uses American terminology which I had to get my head around as I had only just got the hang of British terms.
I'm not a fan of every item in the book but there were a few items I really liked and it seemed like a good choice for a beginner especially from the options available in the general book shop I was in.
My favourite pattern is easily the shell stitch hat, Surfer Chick Quick Cap, on page 109. 
I have made this hat I don't know how many times, most female members of my family have received one at some point! I've made them in lots of sizes by changing the wool and hook size, right from newborn upwards. I also quite often add a accent such as a crocheted flower or a button. I also tend to make it a bit longer and not quite so tight as the one pictured in the book.
There's no scale in this picture but it's for a newborn and the yarn was a super soft mix.
The first item of clothing crochet item I attempted was the "No Sweat Hoodie" on page 91. This was just after the first hat I made. As I had found that nice and easy, I was buzzing with confidence. 
Unfortunately I never actually finished the hoodie though, I made all the sections but when it came to sewing it together I couldn't get it to work. So I folded it up, but it in a storage box and promptly forgot all about it. 
I decided now was the time to rescue the sections from the depths of my storage mountain and see if it's clear to me now that I have a good bit of experience behind me and I have to say I must have been a complete moron back then!!
I honestly don't know what was wrong with me but I can't have been thinking straight. The hoodie features raglan sleeves- I know full well what raglan sleeves are and did so long before I could crochet, so I don't know what my excuse is for completely missing an entire section of the pattern; this resulted in both my sleeves ending with straight tops without raglan shaping at all?!? 
Before
Like I said, moron. I'm going to put it down to the fact I was very inexperienced at reading patterns. Suffice to say it would be impossible to finish it as it was. Thankfully I've come a long way since then so decided to finish the jumper.
I looked up to see if there were any discussions online and found some comments on Ravelry. That made me feel a whole lot better as other people were struggling with the back and I managed that at least. Although, looking at the pencil notes I made all over the place I don't think I found it super straight forward.
I finished the arms to a nice raglan point (yay!) 
After- raglan style!
I sewed the front, back and arms together and tried it on. It was okay but not great, a big short and tighter than I would have liked. To be honest the yarn I chose may have been a factor but it is the correct weight suggested and after doing a tension square I used a 12mm hook instead of 11.5mm to obtain the gauge needed. I loosely attached the hood and decided against it altogether, it didn't look right at all only coming up to the top of my head. 
So to increase the length, I decided to add a waist band using three rows of half treble stitches (US= half double stitches) and a row of double stitches (US = single stitch). 
Once I had done this I decided to make it a polo neck jumper with 4 rows of half trebles and a row of doubles to match the bottom and I completely disposed of the hood altogether. 
(If the sleeves hadn't been plenty long enough as they were, I would have added wristbands to match also.)
That's the great thing about a bit of experience, it gives you the confidence to change the pattern up a bit and even make your own patterns. In many ways I actually prefer to make it up as I go along now rather than reading a pattern but you do have to allow for trial and error!

I used Patons' "Eco Wool Chunky" to make the jumper and while it is really nice to crochet with and the result is lovely and snuggly, I'm not very keen on the colours. I think my taste must have changed since then, although it looks better as a ball. It is ecological though and knowing me it was probably on offer? ;-)

What do you think? Thanks so much for reading this post!

Until next time craft in earnest, Craftin' Ernest x

Thursday, 18 September 2014

Wool, Bees & London!

Ooh I've been a little lax of late post-wise as so much has been going on!
The weekend before last was truly wonderful thanks to the fantastic City of Bristol! Although I live in South Wales I am just a hop, skip and a jump from the border with England and thus only 20 minutes from Bristol (where I actually work and got married).
Bristol is such an amazing and colourful city, it's quite small but has a lot of diversity and has a truly ethical spirit. It has it's own barter currency, it really promotes supporting "local" and has a real artsy feel about it. The famous graffiti artist, Banksy is from Bristol and there's always some impressive art project taking place, for example see my previous post about Knitted Bristol here.

Being such a great place, more often than not there's something that attracts my attention but that weekend was extra special... Bristol hosted it's first WOOL FAIR and a BEE FESTIVAL!! Whoop, whoop, two of my favourite things :-D
I volunteered for 3 hours at the Wool Fair, my duty was to stand at the entrance/exit gate collecting people's tickets and giving them a wristband. It was a lot of fun and I met some interesting people, many of whom were quick to give their opinions (most of which were positive thankfully) and saw lots of sheep and a couple of lovely alpacas. 
For the few hours of volunteering, I had free access to the event and felt totally justified spending the money I had saved on the entrance fee (and a bit more too) on woolly goodies!
Here is my lovely haul...
If I really had to choose a favourite it may be the pair of 11mm rosewood knitting needles from The Little Knitting Company. They're such a pleasure to knit with and what made me love them even more was my husband thought I'd bought myself a Harry Potter wand when he first saw one of them.

The Bee & Pollination Festival was hosted by The University of Bristol's Botanic Garden which is a wonderful venue in itself. There were lots of exhibitors, talks and demonstrations and, as it was a beautiful day, there were lots of bees and pollinators about, doing their thing, buzzzzz!


After the fun of the weekend I had my birthday to look forward to so made a week of it. I headed to London for a girly break with my sister for a few days. We shopped a lot, caught a West End show, "The Pajama Game" which we really enjoyed and it included sewing (it was set in a pyjama factory), perfect!

We returned in time for my birthday on Friday, this was spent exploring the amazing Roman ruins in Caerleon which is only 15 miles from where we live and eating lots of cake.

Then on Saturday I hot-footed it back to London for a long weekend, this time with the hubby for more sight-seeing and BBC Radio 2's Festival in a Day. 
Of course, I took some crochet with me to keep me busy between the bands.
Again we had a fantastic time and we got to see the incredible poppy art installation at The Tower of London, "Blood Swept Lands and Seas of Red". It marks the anniversary of the First World War and by the end of Autumn the Tower's dry moat will be filled with 888,246 ceramic poppies, each one representing a British or Colonial soldier killed during the war. The last poppy will put in place on Remembrance Day. Already it is a pretty incredible sight and very moving.
So all in all I've been pooped since we got home on Monday, I returned to work on Tuesday and I have only just returned to "normality"!
Thanks so much for reading, I really appreciate it.
Until next time, craft in earnest! Craftin' Ernest x


Tuesday, 2 September 2014

Crochet Ringed Necklace Tutorial

I can't believe it's September already, time is just flying by! However, as it's my favourite month I don't mind too much. Whilst the weather has actually taken a change for the better with the Sun shining brightly, the colours of the leaves have started to change and Autumn is certainly on it's way. Before I get cracking on the big woolly scarves and hats I thought I would make something a little more delicate....
I've seen necklaces similar to this a few places and really like them. So when I stumbled across an assorted pack of rubber o-rings for 99p in the hardware section of my local Wilkinson's the other day, I immediately knew they'd be just the thing I needed to make my necklace. As they vary in diameter and thickness I thought they'd provide the perfect, varied base rings and they are flexible but hold their shape, also they weigh next to nothing so the necklace would be nice and light.
I'm afraid I didn't take the picture until after I'd opened and removed the o-rings I was going to use- sorry dopey me!
What you need:
O-rings (or similar for you base- you might find something you prefer/better)
Embroidery cotton or fine yarn
Small crochet hook
Sewing needle
Scissors
Chain, jump-rings and fastening e.g. lobster clasp
Pliers
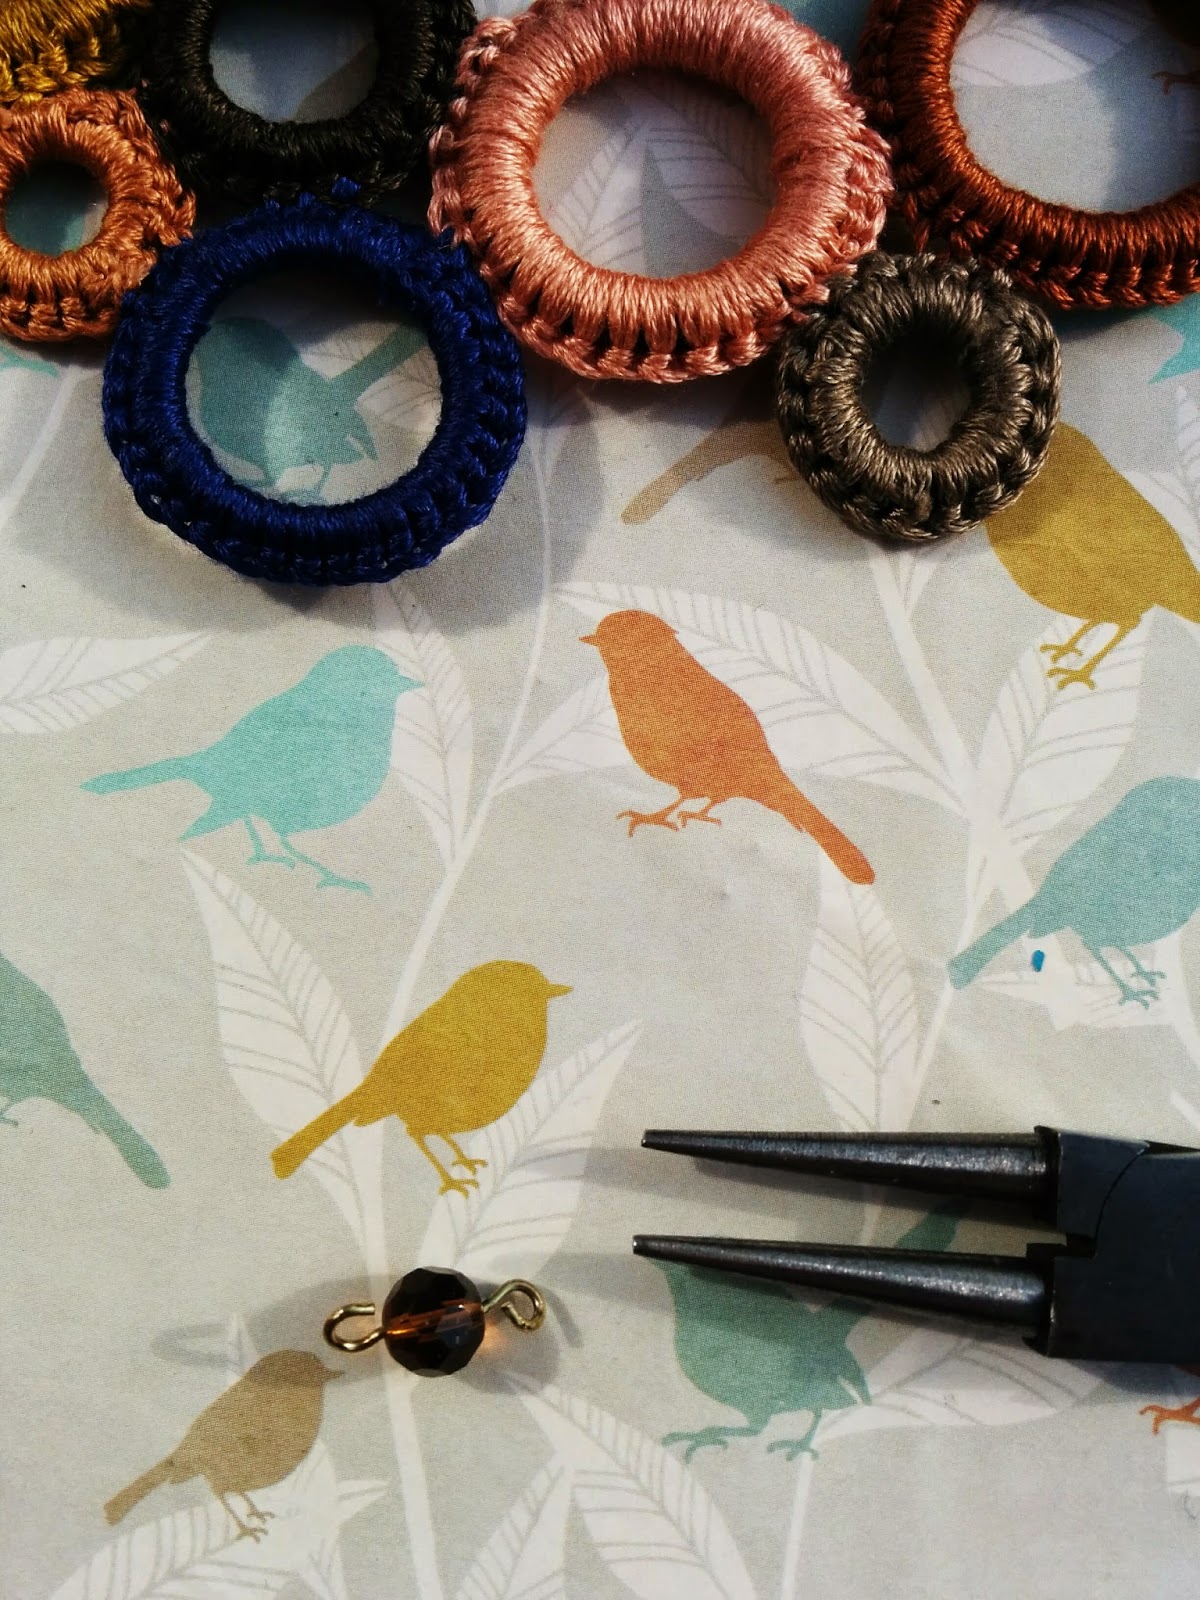
A couple of beads are optional but do make a nice addition in which case a small amount of coordinating wire is also needed, together with round-nose pliers and wire-cutters.


I decided to use 7 of the rings (I always think odd numbers work best for this sort of thing) so I chose the same number of different embroidery cottons to use. I picked 7 colours I liked the look of together and that I thought would go with a range of my clothes. My favourite colour to wear is navy so that was my starting colour and I went from there. Alternatively you could use just one colour or different shades of the same colour might give a nice finish too?

Once I had decided on the colours I arranged the o-rings to a rough layout I liked and started to crochet.
Throughout I used double crochet (dc) with a 2.5mm hook and treated the o-rings as a chain ring and crocheted into the "chain space". Obviously the number of stitches required varied depending on the size of the o-ring but I kept pushing the stitches tightly together to make sure you couldn't see any of the black rubber. 
Once I had completely finished the round and was happy there was no gaps I joined the last dc to the first dc with a slip stitch.
At the end of the round I left a long tail of cotton on each ring to use to sew the rings together. 
I did this by sewing a few crochet stitches from two rings together with the tail from one then pulling the thread through a few of the hoops around the ring and cutting off the excess.
I repeated this step with each ring being sure to keep the arrangement of the rings on the design I decided up. The tail of the final ring isn't needed so I sewed this into the hoops of the ring as previously and again cut the excess.
Once all the rings are sew securely together you just need to add the chain. This can be done by attaching a jump ring to the upper, outer edge of the two end rings, going though the top of a single crochet stitch and the end of the chain (see * below as with the beaded step). Then attach the clasp to the other ends of the chain also using jump rings.
If you decide to add beads, thread one onto wire and create a loop either side of the bead with the round-nose pliers. 
Attach one of the loops to the crochet stitch on the ring as with the jump ring and the other loop to the chain. Finish as before.
*If using a jump ring insert as above and attach the chain directly
All done! I'd love to know if you make one yourself. 
Thanks so much for taking the time to read my blog, I really appreciate it!
Until next time craft in earnest, Craftin' Ernest x