Monday, 30 March 2015

Easter Rabbit Care of KreativBuehne.de

Easter is fast approaching and I am most thankful as I plan to enjoy a choc-fest on Sunday after giving up sweet things for Lent. Also, my mum retires on Easter Saturday so my sister and I are taking her for a spa weekend with lots of pampering, I'm so excited!

As I’ve mentioned before my mum loves a seasonal decoration (for example see this Halloween wreath post) so when I came across a *FREE* downloadable template for a 3D Easter Rabbit made from card, I knew my mum would love it. Here's my finished bunny... 
The template is by the incredibly talented Anastasia Baron who runs the German site- kreativbeuhne.de and includes her great DIY blog, http://blog.kreativbuehne.de/ It’s wonderful how generous talented people can be and Anastasia is certainly that! 
Here's one of her photographs of her brilliant rabbits...
Beautiful picture right? No wrinkled background ;-)
Now my very rusty GCSE in German will only get me so far (i.e. not very far) but thanks to the wonders of modern technology, Google translates the page for you. While it’s not always a perfect translation, it can be fun to read and it's wonderful how it opens a whole world of internet pages that would be out of reach otherwise.

The template featured in this blog post- 
http://blog.kreativbuehne.de/2015/03/osterhasen-basteln-als-osterdekoration.html can be downloaded as a PDF for free and it's really enjoyable project. It comes as 13 pieces, ‘A’ through to ‘M’, on 7 pages. It consists of solid lines (the cut lines), short dashes as the score-and-fold-inwards lines and long dashes as the score-and-fold-outwards lines.
The instructions on the printout are in German but the Google translation of the blog itself is more than enough to make the project straight forward. I found it the right mixture of a little bit fiddly and very satisfying to see it take shape.
I cut out all the pieces first but did the scoring to each piece as I went along with the construction. Although the instructions advised using a knife, I actually used a biro type pen that had run out of ink along with a ruler to score the lines. I started with a roller glue dispenser but changed to squares of double sided sticky tape as the dispenser ran out and I actually preferred the tape, it felt a better bond. I used a craft knife to cut the squares while on the roll and peeled them off as I went along.

Once complete you have a great Easter decoration and as it's hollow you can hide treats inside.
From start to finish it took me about 3 and a half hours but I did watch 2 of my favourite films (Harry Potter and the Deathly Hallows Part 1 and Finding Neverland) and was distracted a little during the best bits of the two so could have been quicker, but why rush when you're enjoying yourself? I'm really delighted with the end result.
Anastasia's online shop, http://paper-shape.com/ features models of animal heads, including a horse and my personal favourite a deer complete with antlers. You can buy the templates printed onto heavy stock card in a number of colour combinations and once complete they can then be mounted on the wall. I think it would look great with necklaces hanging off the antlers.
I have to say a huge thank you, well actually that should be danke sehr, to Anastasia. It's an amazing project which I really enjoyed making and it was very kind of her to make it a freebie!

Until next time craft in earnest, Craftin' Ernest x

Wednesday, 25 March 2015

A-tissue (Bless You) Holder

Hello! Although there are definite signs of Spring in the air, it seems to me just about everyone is suffering from a cold at the moment?  However, even if you’re lucky enough to be cold free it’s always good to have a tissue or two on you and this is where a pocket tissue holder comes in very handy- it’s just so much nicer than the packets they're sold in. I must admit they're a little twee but I like that. My Irish Grandma always, and I mean always, had a tissue on her so this post is dedicated to her.
 
These tissue holders are really simple and quick to make, they’re also great for using up scraps as you only need two pieces of fabric approximately 17cm x 14 cm. The pieces can either be the same so that the lining and the outside are identical or you can use two different fabrics as I have done for this tutorial.

The pouches fit up to 6 or 7 of the standard size, folded pocket tissues measuring approximately 10.5cm x 5.5cm. In just 10 simple steps you're ready to pop one in your bag and go...Cut 2 pieces of fabric 17cm X 14cm.


  • With the right sides facing, pin and sew along both the short edges.
  • Turn the fabric right sides out and iron the sewn seams open.
  • With the outer fabric facing up, fold the fabric so that the sewn seams over lap each other by approximately 1cm and pin in place (you should now only see the lining fabric). It should measure approximately 7cm across.
  • Sew along both ends, first using a straight stitch with a 0.5cm (5mm) seam allowance followed by a zigzag stitch to secure the raw edge and make things a little neater.
  • Trim all four corners off up to the line of straight stitching.
  • Pinch all four corners and pin with the seam folded down to the opposite side of the opening i.e. where the edges overlap
  • Sew a straight line across each pinch corner 1cm (10mm) from the point and trim the excess
  • Turn the pouch the right way out
  • Fill with Tissues!

  • I think they make great, little gifts and are so quick to make you can knock one up for each handbag- because who only has one bag?
    I’d love to know your opinion or if you give making one a try. Until next time craft in earnest, Craftin’ Ernest x

    Sunday, 22 March 2015

    How to Keep your Teapot Snug - Part 2

    This post follows on from Part 1 which covered the outer design part of the tea cosy.
    With the decorative sewing finished it’s time for the construction sewing to begin.

    I started by sewing the notch at the top of each side together by pinning the right sides together and sewing along the edge.
    Next I pinned the two sides of the cosy together, again with right sides facing, and sewed from the bottom of one side all the way round to the bottom of the opposite side.
    I also popped in a loop of decorative ribbon 
    with the hoop facing down and the edges sticking out of the top at the centre point (where the seams for the sewn-up notches meet). This was to create a handy little pull to remove the cosy from the pot when more tea is required, an important little touch.
    Once the seam is done it can be turned the right way out with the seams on the inside.

    For the lining I pinned one of the layers of lining to the black felt insulating layer. My lining fabric doesn't have a right or wrong side but if it did the wrong side should be facing the insulation. I randomly sewed starting from one edge using a straight stitch to a different edge, once the next edge was reached I turned it and sewed to another one. I repeated this step a few times giving the lining a quilted texture.
    I did exactly the same for the second piece of lining and insulation.Once both sides were completed the construction of the lining sewing could begin in a very similar manner to the outer part. Again the first step was to sew the notches closed, this time the edges were joined with the lining fabric on the inside and the black felt on the outside. Once both of these were sewn closed the two sides of the lining were sewn together by pinning them together, as with the outer layer, but with the lining sides facing each other. I made the seam allowances twice as big as those for the outer section to make it a little smaller to fit inside, i.e. I used a 5mm seam allowance on the outer section and a 10mm allowance on the inner lining section. I trimmed the seam down for the lining to about 5mm after it had been sewn so there wasn't an excess of fabric creating bulk.
    Now it was time to insert the lining into the outer shell. I matched up the seams and gently tugged it into place, smoothing the outer section over the inner section.
    I had to trim down the inner section at the bottom to make the lining and the outer parts the same length. 
    I used shop-bought, navy blue bias binding to finish off this last raw seam, pinning it all around the edge making sure that both sections are securely within the binding. I sewed it approximately 2mm in from the edge of the binding.
    Once the threads have been neatly trimmed it’s good to go - a completed cosy just right to keep the pot snug and the tea hot!
    Thanks so much for reading the post, I'd love to know what you think!
    Until next time craft in earnest, Craftin' Ernest x

    Wednesday, 18 March 2015

    How to Keep your Teapot Snug- Part 1

    A friend of mine has introduced me to the pleasures of a cup of green tea and having previously never drunk hot drinks (hot chocolate not included of course) I’m now addicted and drink umpteen cups a day. I've even got my sister drinking it as well though she was very skeptical to start with, not liking hot drinks even more than I did.
    We now have our TV catch-up evenings, watching the likes of “Downton Abbey” and “Call The Midwife” with our pot of green tea made using teabags.

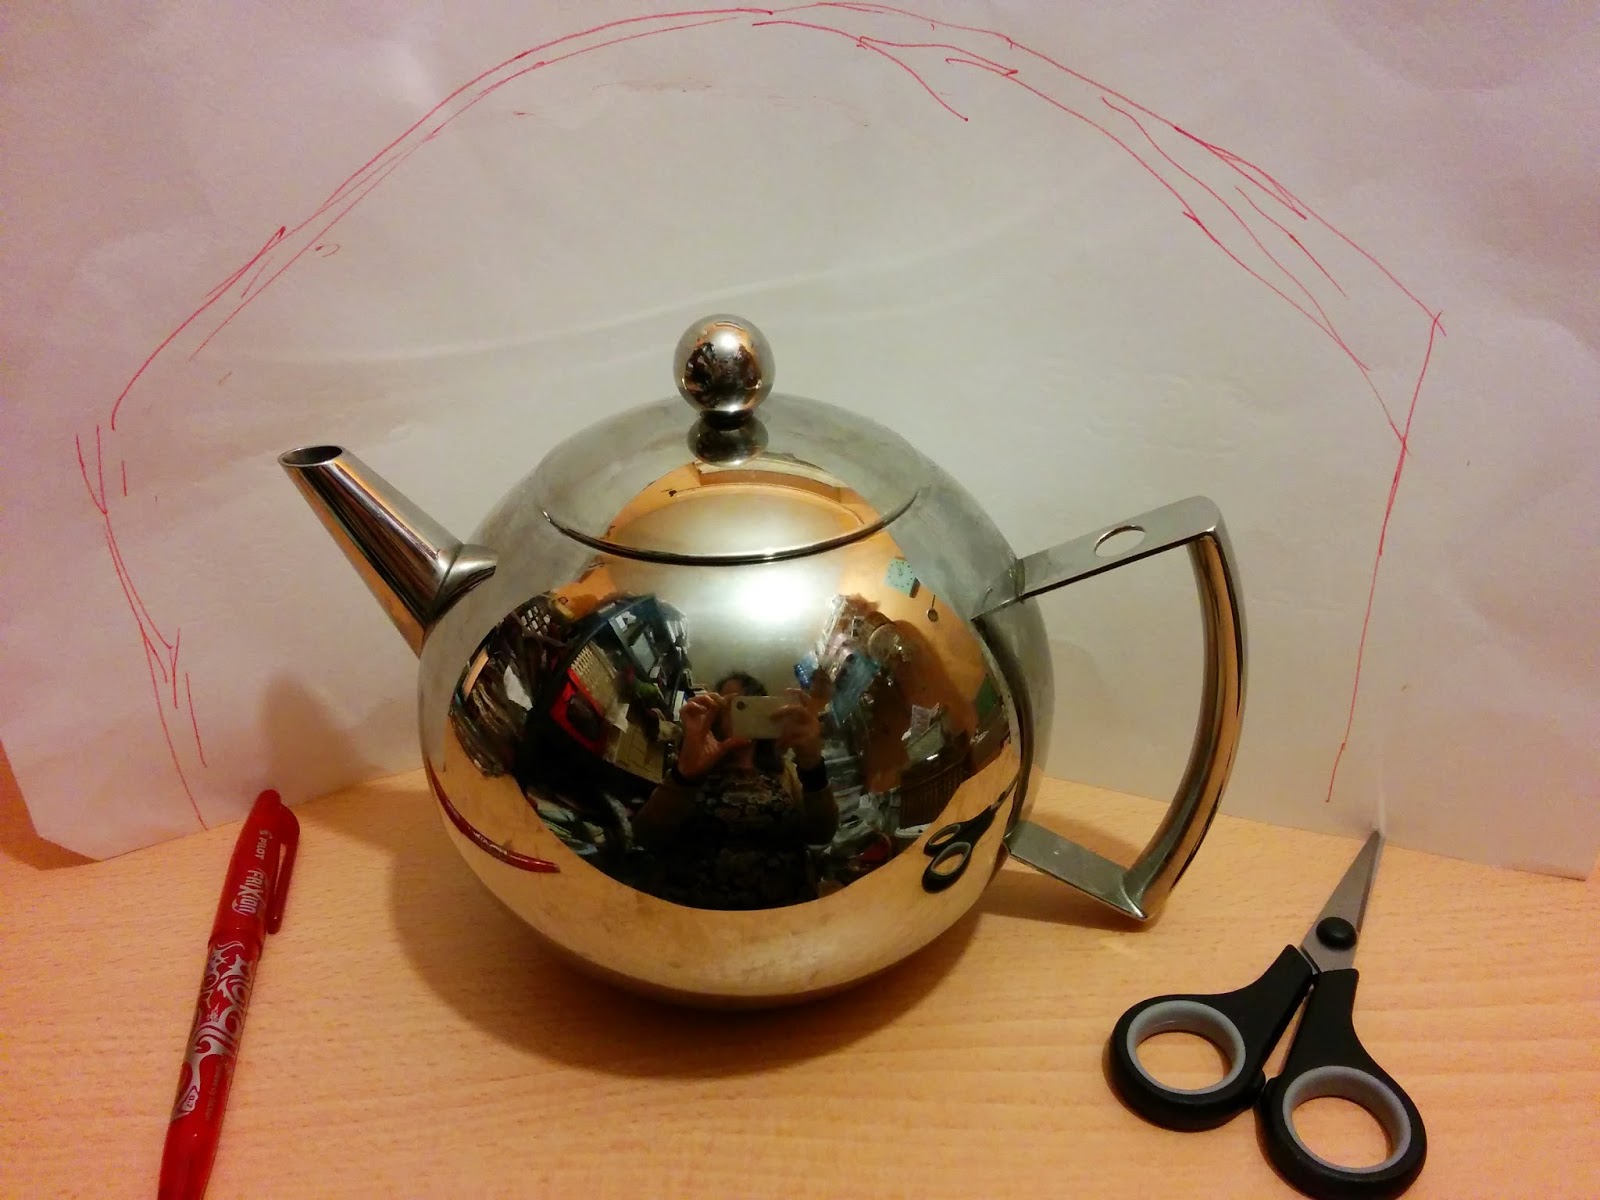
    Last month I went on my annual February trip to Ireland (see previous trips here & here) and picked myself up a wonderful, retro-feel, stainless steel teapot with diffuser for loose leaf tea. It was in a Charity shop and was only 5 Euro, splendid stuff!
    On a side note, I've got a thing about small teaspoons and also bought 4 of them whilst I was over there. Having only hand luggage booked on the flight I had to pack the teapot and spoons in my teeny wheely case, the airport security must have thought I take tea drinking very seriously as they were x-raying my case.

    I decided this new teapot called for its own special tea cosy- so to the sewing machine.

    I used a large piece of paper to make a pattern by folding it around the teapot and drawing the rough shape I thought would work, I removed a notch from the top to create a rounded shape top once sewn.

    I cut the template out and made adjustments as needed, for example, I had to shorten it.

    Using the template I needed to cut out a total of 6 pieces-
    2 pieces of outer fabric (patterned fabric in photo)
    2 of the insulating layer (the black fabric in photo)
    2 for the lining (deep pink fabric)
    I actually used an extra insulating layer as I was “making do” with what I had to hand, the black fabric- a 100% wool felt and had it been a little thicker I would not have needed anther layer. I used a blue fleece, for a little extra warmth, on the back of the outer layer treating them as one layer i.e. I sewed the decorative pattern to both these layers as one.
    For the main body of the cosy I picked a remnant of stone coloured fabric with a dark blue printed design of a plants and birds, I thought the folks at Downton would approve.
    I used a zigzag stitch to machine sew a length of lace ribbon to each side of the outer layer approximately 5cm from the bottom.
    I decided upon a teacup design, cut a template out of scrap cardboard, and picked a bright, fuchsia pink fabric which technically is actually a napkin- I bought these a few years ago in Primark for the ridiculous price of £2 for 4 large napkins, they were always destined for a sewing project in my house not their intended purpose. I used another napkin for the lining to match the teacup.
    I used “Heat n Bond” to attach the teacup. “Heat n Bond” is amazing stuff and well worth having in your sewing arsenal. It has paper on one side and the mesh of bonding fabric on the other. First you iron it onto the fabric of you design, in this case my pink fabric, with the paper facing up. You draw your design on the paper; this can be done free hand or using a template as I have done. You can then cut it out. 
    Once you have your shape, the paper is removed and the design is attached in place with an iron. I've always had nice strong bonds using “Heat n Bond” but I like to sew around the edge for extra strength but more importantly because it looks so much nicer.
    As every project can be improved with a few buttons, I hand sewed some teeny ones onto the cup as polka dots. It occurred to me afterwards that I hadn't sewn on a saucer, Lady Violet would have been appalled! 
    I repeated the same for the other side and that's the decorative part done. 
    In part 2, to follow in a few days, the cosy comes together and the tea in the pot is kept nice and toasty, until then craft in earnest! Craftin' Ernest x

    Monday, 9 March 2015

    Birthday Bunny

    I met one of my bestest buddies in the whole world at University and while it's been a year or two (perhaps even more?!) since we graduated and we don't get to see each other as often as I would like, I know she's always there for me.
    Last year she and her husband had their first baby, William, who is just incredibly adorable and turns one today!
    I wanted to make him something hand-crafted as part of his birthday present. I did this as part of his Christmas persent too, and if I'm honest, it did not go so well. 
    I decided to make a themed hat for him- a Christmas pud hat and just made it up as I went along starting from the top. 
     As usual with me, it was a little last minute (I was organising a Christmas Eve wedding to be fair) so by the time I realised it was going to be a bit, i.e. a lot, on the large size I didn't have time to make another so sent it to him anyway. I did feel bad but on the positive side he can now grow into it and can still be wearing it on Christmas 2025. Here's the gorgeous little man himself, modelling said hat!
    For his birthday I decided to steer away from clothing and go for a safer option of a toy- a crocheted rabbit. 

    I thought to make things a little easier I would use a pattern but not wanting things to be too simple I altered the pattern as I went along.
    Lion Brand Yarns (LBY) are a fabulous yarn manufacturer in the US and happily their yarns are easy to get hold of in the UK thanks to the internet, such as from LoveKnitting.com
    Having said that, there's nothing like buying yarn in person so last time I was in the US I made a trip to a Micheal's (a nice big tick on my wish list) and bought a few different balls.
    The LBY site has a really wonderful selection of patterns, a huge amount of which are completely free when you join up to the LBY Community for free!! 
    The best part is the search function as you can filter by craft, wool type, recipient, skill level and more- it's fantastic and definitely worth having a look! Of course being an American company the crochet patterns uses US terminology, something to keep in mind if you're the other side of the Atlantic.
    Well for William I found this cute fellow, Boudreaux The Bear, by selecting- "crochet", "for babies/infants", "toys".
    The LBY pattern section does have rabbit patterns but for some reason they didn't appeal to me the same way Boudreaux did and I thought with a few adjustments he'd make a nice bunny.
    He is crocheted in the round with a stitch marker indicating the start of each round and Martha Stewart Crafts Roving Wool in Fence Post. The instructions say a 6mm hook but I used a 5mm by accident, thankfully gauge isn't important and by the time I realised he was done!
    I followed the body instructions almost exactly except I added an extra round of single crochet (US, double crochet in British terms) just to make him ever so slightly longer and leaner.
    I added quite a few extra rounds to the head because I thought a rabbit's head needs to be longer than a bears.

    For the limbs I used Boudreaux's arm instructions for both the arms and legs but I added 2 rounds of sc before the final 2 round of decreases. 
    I had to make up the ears and the tail. 

    The tail was simple and made up using only 3 rounds:
    Rnd1- I worked 8 sc (sticking with the US terms) into a magic circle.
    Rnd2- 2 sc in each sc around
    Rnd3- sc2tog around

    For the ears I followed the first 4 rounds of the arms.
    Rnds 5-8 1 sc in each sc around
    Rnd9- sc2tog around
    Rnd10- 1 sc2tog and fasten off. This gave the end a point, I flattened each ear and sewed the two sides together as I was sew the end of wool in.
    I then attached all the sections together using a plastic needle and the ends of the wool.

    All that was left was to sew a little face on. For this I used embroidery cotton, pink for the nose and black for the eyes and mouth.

    He ended up being about 30cm tall, the same as Boudreaux. I didn't add a ribbon though as I was worried it may come loose even if sewn on.
    Hopefully William likes his new little buddy!

    Until next time, craft in earnest! Craftin' Ernest x

    Wednesday, 4 March 2015

    Heat Erasable Pen Review

    Whoa that's a catchy post title, I don't think!

    However, I think heat erasable pens are great- at least 5 orders of magnitude better than air erasing pens for embroidery projects, in my opinion, and thus worthy of a post!
    I really enjoy embroidering, both by hand as well as freehand machine embroidery and it's great to draw your design straight on the fabric.
    However, I really haven't had much luck with my purple air erasing pens. I have only tried two brands before giving up on them though, so others may be a lot better (please let me know if you've found a great one). I find that it either disappears very quickly, within a matter of minutes, or that I have to remove it with water when I would prefer not to. I was advised to store the project in an airtight grip seal plastic bag but even then it didn't last. In the project above, from last year, I used tissue paper but that can take an age and a lot of patience to remove afterwards as tiny pieces are always left.

    Then I discovered heat erasable pens. I had been using them for a good number of years as a regular writing pen without even thinking of their crafty potential. They are available in a variety of colours but all basically are accompanied by a "rubber" (or eraser if your prefer) either on the lid on the bottom of the pen itself. The ink can then be erased by rubbing this against the writing and the heat from the friction causes the ink to disappear as if by magic, very handy if you make a mistake.
    The first one I ever used on paper was Pilot's Frixion and thought it was great.
    There is actually a warning on the back of the packaging to not expose the ink to extreme temperatures (-10degC to +65degC) and this gave me the idea that high temperatures from an iron might also cause the ink to vanish. This could be just what I needed and sure enough it was- Yay!! 
    It works just perfectly, it writes on fabric nicely with a 0.7mm line and leaves no sign after heat is applied. I find the best place to buy them is online but you can sometimes pick them up on offer, Tesco have a pack of 3, one each of black, red and blue, on offer at the moment for £5. However, a pack of one black and one yellow highlighter is £6.25. I've never tried the highlighter but the other colours all work just as well as the black.
    The next brand I found was in the lovely Japanese shop Muji, which is full of great stationary and other household bits and bobs. Muji's erasable pen is £2.50 and works well on fabric and erases without a trace as soon as the iron gets near. It's also finer than the Frixion at 0.5mm and writes on fabric smoothly enough.
    However, it turns out that not all friction pens are equal when it comes to erasing from fabric. After not being able to get hold of a Pilot's Frixion late on a Sunday afternoon, I decided to try Papermate's Replay Max available from Wilkinson's for £1.20. The packaging informed me this time that the ink becomes permanent after 24 hours. This was potentially bothersome but I thought it could still be used for projects completed in a day. 
    Well I thought wrong! 
    Although the ink may be erased with the rubber, heat does nothing at all except perhaps spread it and therefore it's no good for fabric. This is a shame as it's the cheapest. However, this one is good for writing projects where it would be handy to erase a mistake but you want the result to be permanent in the end.
    Another shop I really like is the Danish store, Tiger, it sells all sorts of lovely things. The stores used to only be located around London but much to my delight they're all over the UK now, yippee! 
    Their erasable pens come in a pack of 2 in black for £3. Unfortunately, just like the Papermate, they're no good on fabric either. They don't budge with heat and leave a mess around the writing :-(
    I would highly recommend the use of the Pilot Frixion or Muji for sewing projects (the others are great when used on paper though).
    Please let me know if you have any thoughts or know of other pens to use out there.
    Thanks for taking the time to read my post. Until next time, craft in earnest! Craftin' Ernest x